Most websites claim the Langtang Valley Trek Difficulty Level is Moderate. But if you individually ask people who’ve actually been there, some say easy while others say it was difficult and they had regrets.
Why is this?
Well, it’s because there are a bunch of things that affect our perception of ‘difficulty’:
- Highest elevation, rate of elevation gain, altitude sickness
- Route condition, weather, and safety
- How many hours we walk per day, how long the overall trip is
- Our fitness level and existing health conditions
- Previous trekking experience and ability to adapt to basic mountain life and lack of facilities
- Physical and mental preparation + proper planning prior to trek
Get everything right and Langtang valley is genuinely a short, fun, easy trip. It’s one of the most accessible and recommendable treks in Nepal.
Get everything wrong and you could quickly go from miserable to straight up in-danger. Let’s make sure that doesn’t happen to you.
How Difficult Is the Langtang Trek: Quick Look
|
Difficulty Grade
|
Moderate (non-technical hiking route)
|
|
Max Altitude
|
Lower Kyanjin Ri (4,400 m), Tserko Ri (4,985 m)
|
|
Max/Min Temperature (°C)
|
20° (summer days) to -15° (winter nights)
|
|
Experience Required
|
Beginner-friendly
|
|
Fitness Level Required
|
Adults in good health with average fitness
|
|
Standard Itinerary
|
7 days (KTM to KTM)
|
|
Avg Walking Hours / Distance
|
6-8 hours / 10-12 kms per day
|
|
Avg Altitude Gain
|
900-1200 m per day (including viewpoint hikes)
|
|
Risk of Altitude Sickness
|
Low
|
|
Typical Weather
|
Warm days with some clouds & cool winds, chilly nights
|
|
Extreme Weather
|
In peak monsoon and winter
|
|
Packing List
|
Standard Nepal hiking pack (8-10 kgs)
|
|
Trail Type
|
Forest trails, subalpine valleys, alpine ridges
|
|
Trail Condition
|
Maintained and accessible (except during extreme weather)
|
|
Help and Rescue Access
|
Nepal Army Outposts, Health Clinic, Heli Rescue
|
|
Amenities
|
Basic Hotels, Bakeries, Bank, Electricity, WiFi, Hot Showers
|
|
Most Difficult Section
|
Viewpoint hikes (Kyanjin Ri, Tserko Ri)
|
Factors Affecting Langtang Trek Difficulty
The elevation, your itinerary, fitness level, and weather/trekking conditions are a few main factors that determine the Langtang Trek difficulty.
Elevation Gain and Altitude Sickness
The number one thing that differentiates treks in Nepal from the rest of the world is altitude. Most treks here are at high elevations (3,000-5,500 m or 9,800-18,000 ft).
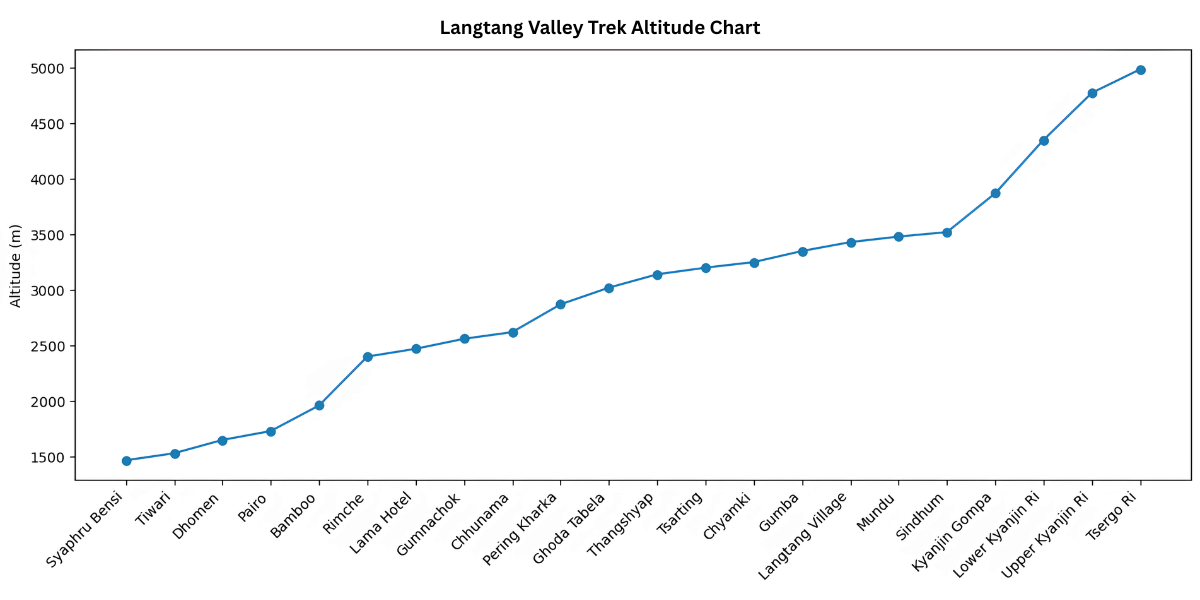
You’ll start the trek at Syabrubesi and stay the night at Rimche (2,495 m) or Lama Hotel (2,515 m). Trekking to Ghodatabela (3,008 m) and higher on the second day, you’ll notice you’re breathing harder and your heart is beating faster.
Your legs get pumped on the uphills and your calves tend to burn quickly. Each step takes a little more effort. One of my guests described it as ‘so weird that her body was fine yesterday but suddenly struggling now’.
At Langtang village (3,455 m) and Kyanjin Gompa (3,890 m), you may notice your sleep wasn’t that great. And you’re not too keen about the food up here.
This is all completely normal; no cause for concern. The air is roughly 35% thinner around Langtang and Kyanjin compared to sea level.
This lack of oxygen makes things harder in many ways. But it’s just a matter of adapting and pushing your body a bit more compared to sea level.
Our standard Langtang itinerary is designed with a time-tested 900-1200m elevation gain per day (including viewpoints, so we climb high and sleep low).
Follow a comfortable consistent hiking pace and you’ll complete most of the trek with no issues.
But if your itinerary is poorly designed (too fast) or you’re hiking to high viewpoints (like Tserko Ri at ~5000m), you may feel more signs of Acute Mountain Sickness (AMS):
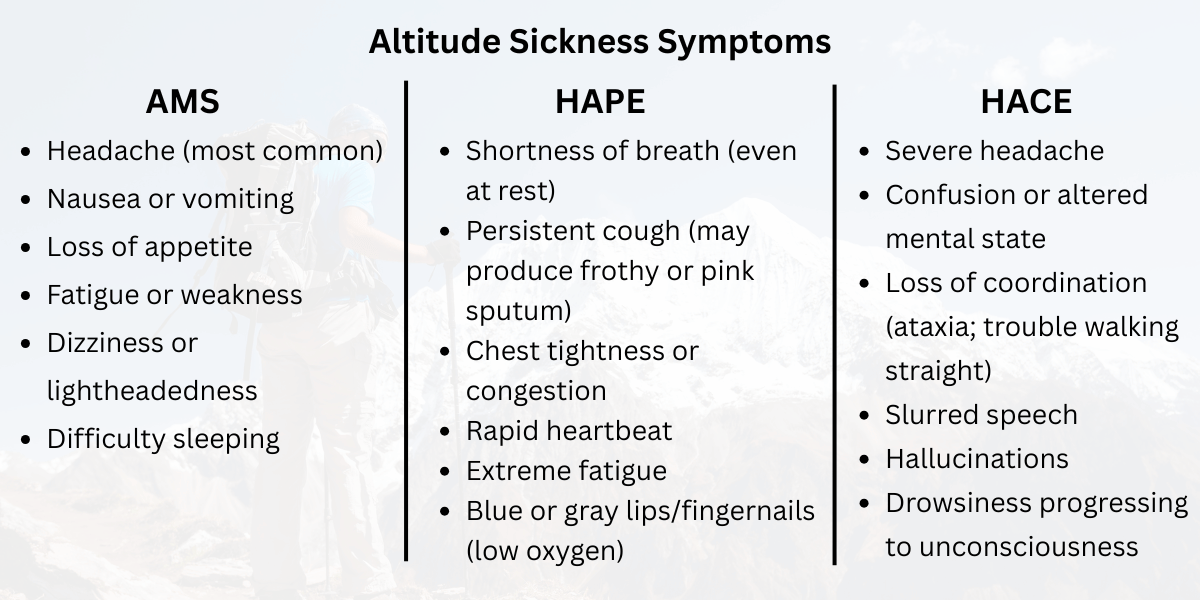
- Headache
- Nausea and loss of appetite
- Insomnia
- High fatigue
- Shortness of breath
These signs means your body hasn’t had enough time to acclimatize to the altitude. AMS left unchecked can deteriorate into HACE/HAPE which are extremely dangerous and often fatal.
So, if you notice multiple signs of altitude sickness, do NOT ascend higher until you feel better. Communicate how you’re feeling with your guide and make a quick descent if symptoms worsen.
Ultimately, different people adapt to the altitude at different rates - some quicker, some slower. But the principles are the same for everyone:
- The altitude makes things harder compared to sea level (applies to everyone).
- A rushed itinerary causes more fatigue and increases chances of AMS. Take it easy to ensure the trek is a success.
Season, Weather and Trail Condition
Weather may be the most important factor to consider when planning most treks in Nepal.
Langtang is an easy pleasant hike in Autumn, but the trail can become perilous even for seasoned hikers during peak monsoon and winter. Let me explain why:
- Spring (March) starts off with leftover snow from the winter. You may see light rain/snowfall. Days tend to be pleasant with clear skies and a cool breeze, while clouds start appearing in the afternoon. Temperatures around Kyanjin range from 18°C (day) to -5°C (night). Basically, excellent conditions for hiking and this normally lasts until mid-June.
- Autumn (late-September to mid-December) is similar but with dry conditions and minimal snow. In these months, you’ll have an Easy-Moderate difficulty trek. The trail is typically dry with good visibility, easy navigation, and no risky zones.
That’s why these are the ‘peak seasons’.
The offseason is a different story:
- Constant rainfall in monsoon makes many sections of the Langtang trail landslide-prone. Streams and waterfalls pop throughout the trail, and some of them are tough to cross. Walking while drenched under nonstop rain is both physically and mentally challenging. You’re wet, cold, tired, and don’t get to rest well or enjoy good views. The trail is muddy and slippery and dense fog can make navigation difficult in a few sections.
- Peak winter and other periods of heavy snowfall are also not for beginners. The higher elevation sections tend to get covered in snow and navigation becomes tricky. Even if the way is clear, sometimes the snow is knee-deep or waist-deep, making some locations completely inaccessible. The temperature is also the lowest at 6°C (day) to -13°C (night), so you need to pack more, warmer clothes. Less daylight hours means you must complete the day’s trek on time or risk extreme cold and darkness.
Basically, off-season Langtang treks tend to be challenging.
All in all, the Langtang trek difficulty varies a lot depending on the weather and trail conditions.
Peak season is generally easier. But in recent years, spring and autumn have become more and more unstable due to climate change (random rain/snow, more volatile temperatures etc).
Make sure to find good weather windows and get the latest trail update from locals (or local operators like Altitude Himalaya) to have a fun and memorable trek.
Trek Itinerary and Add-ons
Our standard Langtang Valley trek itinerary is 7 days (KTM to KTM).
You climb up the valley for 3 days via Syaphru Bensi / Syabrubensi (1,467 m) > Bamboo (1,984 m) > Rimche (2,495 m) > Lama Hotel (2,515 m) > Thangshyap (3,140 m) > Langtang Village (3,455 m) > Sindhum (3,555 m) > Kyanjin Gompa (3,890 m).
You explore your preferred locations - Lower Kyanjin Ri (4,400 m), Upper Kyanjin Ri (4,700 m), Tsergo Ri (4,985 m), or elsewhere and trek back down the valley. The entire round trip is 62-72 km.
We designed the itinerary to fit most people’s walking paces (minimal fatigue with a safe elevation gain rate).
If you’re not in good health, you can use an even more relaxed itinerary with rest days/minimal walking days to make the trek easier.
Or if you’re looking to trek quicker than normal, you’ll have to walk faster/longer each day. More stress on your muscles/joints and more overall fatigue. Make sure that’s something you can handle when planning the trip.
And finally, if you’re visiting multiple viewpoints/side trips or combining the Langtang Valley Trek with other treks nearby, that also makes the trek much longer/tougher.
For instance, I love to take my interested guests up to Yala Peak South (5,520 m) for the best panorama of the region or to Langshisha Kharka (4,050 m) for wildlife spotting.
People looking to explore more of the region often combine the Langtang trek with the Gosainkunda or Tamang Heritage trails.
You must keep track of your fatigue accumulation and schedule rest days for longer treks like these. Otherwise, the trip will be very physically demanding and you’ll become prone to injuries, cramps, and illnesses.
Also, more on the trek combinations later.
Your Packing List and Preparation
If you’ve ever done any hike at all, you know firsthand that every kilogram matters!
I’ve seen first-time hikers bring clean sets of clothes for every single day, way too much food and snacks (half of them remained unused), multiple pairs of footwear, full-sized toiletry items, heavy books and whatnot.
This is a great way to ensure physical discomfort, higher fatigue, and higher chance of injury.
Of course, the opposite isn’t any good either. If you carry very little gear just to make your pack ultralight, you might regret it in the evening or during bad weather.
The key is to carry efficient things that you’ll actually need, but not bother with too many what ifs. And the only way to figure this out is with experience. For e.g.,
- You NEED a dry set of clothes to change into once you’ve finished the day’s trek.
- You NEED rain gear and spare clothes in the rainy season.
- You NEED trekking poles, gaiters, microspikes, and sunglasses for trekking in the snow.
- You NEED basic meds and first aid equipment.
- You DON’T need a heavy sleeping bag outside of cold seasons.
- You DON’T need to carry 4 kgs of snacks. The hotels enroute are stocked well enough.
Generally, aim for a pack weight of around 10% of your bodyweight for a comfortable trekking experience. For longer or offseason treks requiring more gear, you can push it up to 20%.
The trek will get exponentially tougher as you carry more and more weight above that.
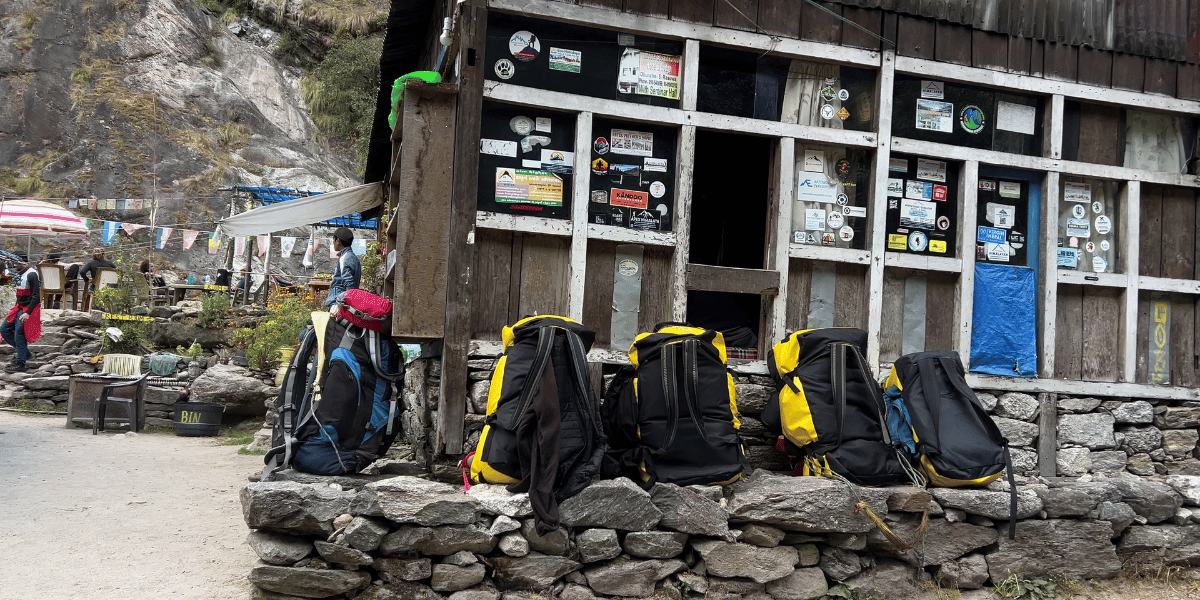
If you’re carrying cameras and drones, hiring a porter is an excellent idea. They will carry your main backpack or duffel with most of your gear. You’ll just carry a light day pack with your camera gear.
Not only will this make your trek way more enjoyable, you’ll also help support local families.
And if you’re camping or peak climbing, porters are non-negotiable. They’ll carry the tents, cooking equipment, group food and safety gear, and some of your personal gear as well.
If you’re confused about anything at all, check out our detailed Langtang Valley Trek packing list. And if you’re doing the trek with us, our management team will be happy to provide more in-depth help over email or WhatsApp.
Chronic and Acute Health Conditions
If you’re healthy and in shape, the trek will be easier. It’s a no-brainer, but let me explain exactly why this matters.
Clearance from your doctor and/or insurance provider is essential if you have any chronic illnesses like Asthma, COPD, high blood pressure, heart problems, severe allergies, Diabetes, Arthritis, Anaemia, etc.
After all, you’re travelling to a remote low-oxygen environment. Such conditions can easily turn into a medical emergency or become fatal. So, we always prioritize clear communication with our guests right from the get go.
If the trek is harder but doable, we plan a safer itinerary, assign medically trained guides, and carry necessary medical and support equipment. There’s a health post in Mundu, and we travel with a reliable heli rescue protocol in place.
If the trek seems too risky due to your health conditions, we suggest other safer alternatives.
All such communication and preparation regarding safety are non-negotiable.
Sometimes, trekkers also catch acute illnesses on the trail (diarrhoea, food poisoning, dry cough, AMS, etc).
These things make the trek harder, but meds and a couple of days of rest enable most people to complete the trek safely.
Ideally, you finish the trek in good health, though, as that makes things much simpler. You only need to worry about your fitness.
How Much Does Fitness Matter
The 7-day itinerary is designed with average people in mind. So, most of us can complete the trek without any real issues or injuries; we just gotta walk 6 to 8 hours every day.
And yes, 6 hours daily in the mountains might sound daunting if you’ve never trekked before. But there’s a lot to see on the trail. Once you start walking, almost everyone finds their rhythm instantly. This is why most beginners choose this trek.
For instance, I’ve seen 7 year olds and 70 year olds do this trek. Their fitness and joint health were much worse than the average adult's, but they followed a more relaxed itinerary, so they had a great time on the trek.
I hope all of this isn’t coming across as ‘being fit is unnecessary’ though. The fitter you are, the easier the trek will be, and the more time and energy you’ll have to explore places and enjoy your time on the trail. Speaking from my own experience,
- I’m always able to visit the highest viewpoints and explore multiple interesting locations because I train year-round and keep myself in excellent shape.
- My hiking pace is excellent. On multiple occasions, I’ve taken shelter during bad weather and still got to camp dry and on time while others had to risk it and walk through the rain and storms.
- I rarely have any injuries/joint pain and I have tons of energy left for my evenings at the hotels.
On the other hand, I often see out-of-shape beginners injure their ankles, knees, or hips. They’re extremely fatigued at the end of the day, so they don’t get to enjoy themselves well at the hotels. And they often opt for lower viewpoints or skip side hikes entirely.
No judgement here - just real experiences from the trail. You’ll complete the Langtang trek just fine even if you’re not fit. But if you ARE fit, it’ll be like having a stroll around your neighbourhood and you’ll have a fantastic time!
Wondering how to improve your fitness for this trek? More on that later in the preparation section.
Outdoor and Nepal Trekking Experience
If you’ve trekked before in Nepal, or just have general travel/outdoor/hiking experience, it makes the trek much easier.
A beginner may describe the Langtang Trek as Moderate or Difficult, while an experienced trekker hiking at the same time may find it Easy.
It’s all thanks to their previous experience, which helps them prepare physically and mentally, make the best gear choices, know what to expect from the trek, and adapt when needed.
Here are some of the main things I’ve noticed experienced hikers do differently:
- Hiking for hours every day gets repetitive. Beginners often get irritated/hopeless about how far they still have to walk. Experienced hikers are used to the physical/mental stress and manage it better.
- They take scheduled water breaks every 30 mins. Relying purely on your sense of thirst is a great way to end up dehydrated by the end of the day.
- Appetite and sleep aren’t great at high altitude. But they force themselves to eat and sleep anyway. This is essential to stay in good shape/health and acclimatize quickly.
- They use trekking poles. Fit beginners often skip this but experienced hikers know it’s not all about fitness. Poles are key to keeping your joints healthy on the trail. Plus, they’re useful for navigating tricky terrain and slopes (especially downhills).
- They know the hotel rooms and menus are basic only. They are comfortable with the level of amenities on the trek.
- They plan the itinerary well and maintain a good consistent pace instead of rushing to finish. This allows for less fatigue, better acclimatization, and more time to enjoy the trail. Slow and steady wins the race!
- Beginners often hike with their down jacket and multiple layers on, which keeps them cold due to heavy sweating. The pros layer properly for the conditions they’re trekking in.
- They hire porters (yes, I’m not kidding!). People that have trekked in Nepal before tend to hire porters more compared to first-timers. They’re well aware of how much easier and more enjoyable the trek will be with a porter to support them.
- The weather, planned route & itinerary, injuries, hotels - things won’t always go according to plan. Beginners panic and often end the trek while experienced trekkers adapt quickly, have protocols in place for different scenarios, and make the best of the situation.
All in all, you can definitely do the Langtang trek as a beginner. But if you have previous hiking experience (ideally in Nepal), the trek will be even easier for you.
Another benefit is that experienced hikers can also trek in the off-season.
I do NOT recommend monsoon and winter hiking in Langtang for beginners. These are extreme weather periods with risky zones on the trail and tougher overall conditions.
But veteran hikers (especially with help from local contacts like Altitude Himalaya) can find good weather windows and enjoy a unique adventure.
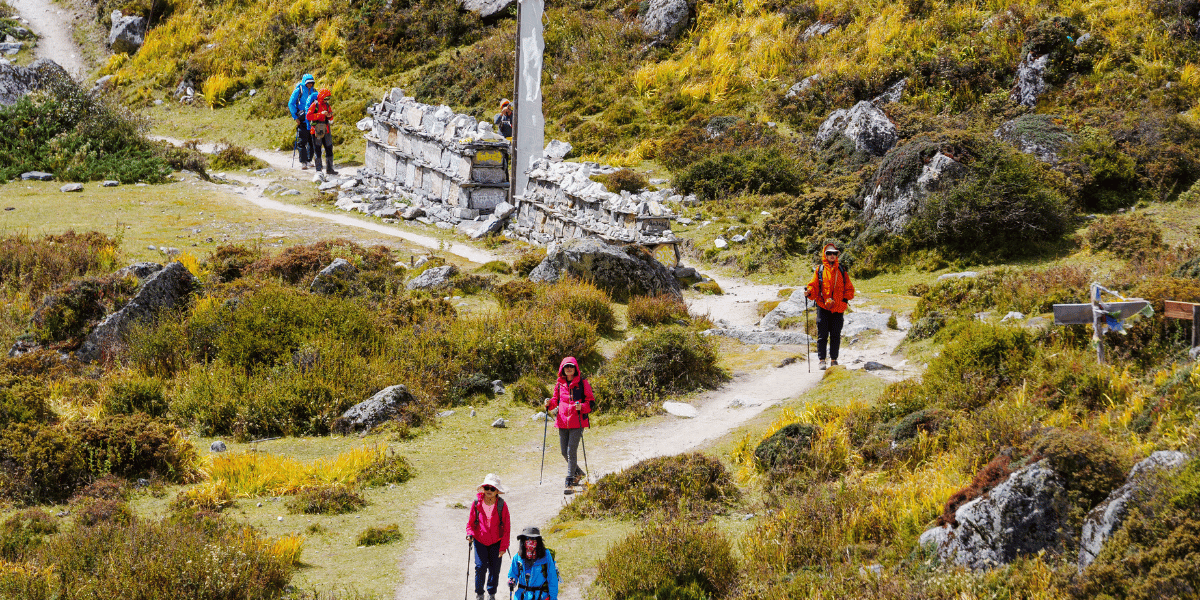
Most Difficult Sections of Langtang Valley Trek
How many hours do you have to walk each day? What are the most difficult sections? How steep are the ascents? What’s the terrain like, and what are some dangers you need to be prepared for? These are the kinds of questions I’ll answer in this section.
Reaching the Trailhead
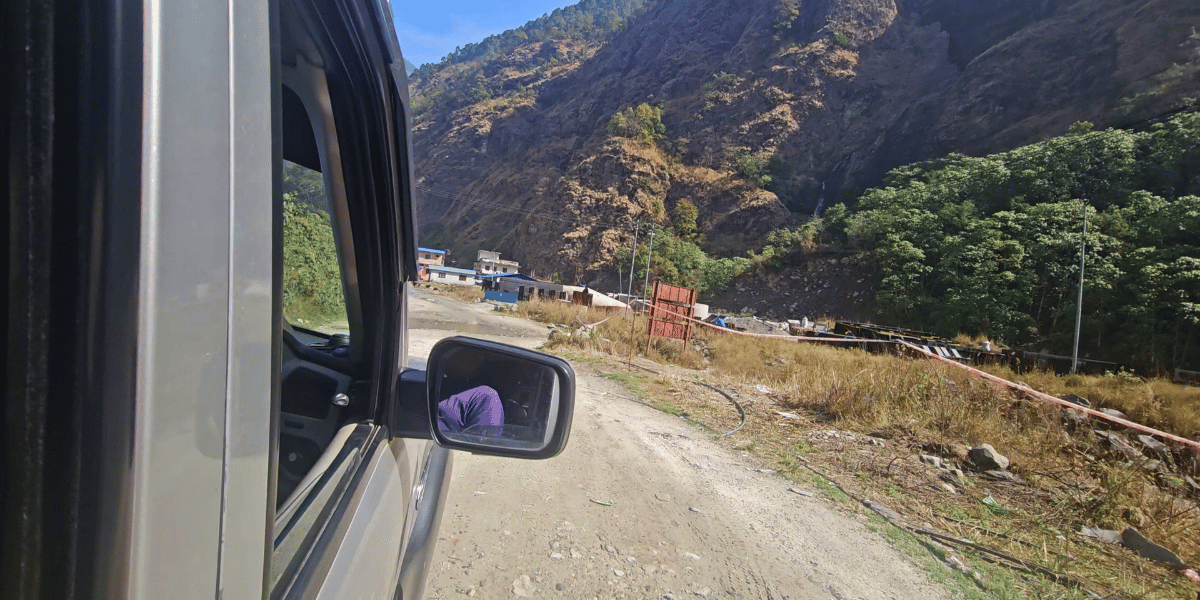
The road to the trailhead (Syabrubesi) has gotten a lot better in the last few years. It used to be a bumpy off-road ride for 8-10 hours. These days, it's more like 5-8 hours on average.
That’s because roughly 75% of the 115 km journey is on asphalt and concrete now. You can take private jeeps, electric vans, public buses, or other private transport as you prefer.
A lot of tourists still find the roadtrip tiring, so they like to rest at Syabru for Day 1. Some others prefer to get a headstart.
There are 3 routes you can take from here.
- The road trail to Domen (1,565 m) is the most direct. It’s a 1-2 hour long flat trail but it’s very dusty due to the road and construction.
- The traditional trail via Tiwari (1,553 m) is cleaner and quieter. It has a few more ups and downs, but it also leads to Domen.
- The high route via Sherpagaon (2,563 m) is the best trekking route. But it’s also the toughest, as it’s a steep 1000m ascent that takes around 5 hours. As of May 2026, the jeep track has reached Noesagang Hill (30 mins hike to Sherpagaon from here). So, you can also take this jeep road to skip the initial hike and speed up your itinerary.
The road trip, dust, and potential ascent are the only difficulties you’ll encounter on Day 1. But in monsoon, there are occasional landslides around Tiwari-Pairo-Bamboo-Rimche some parts of the high route.
On the Forest Trail
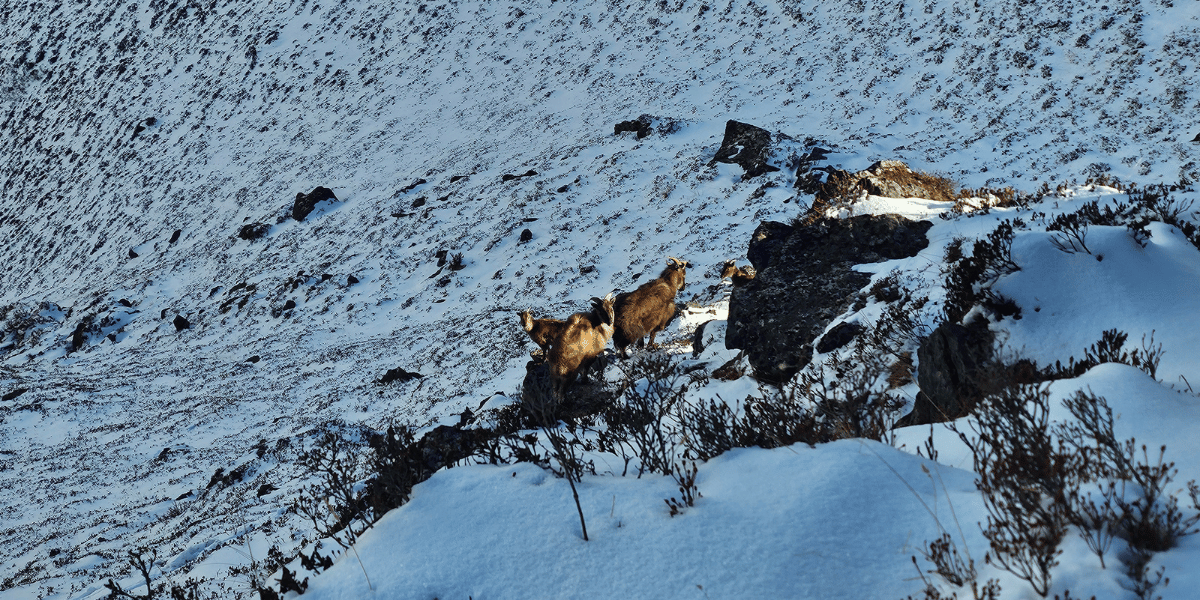
A bit past Domen, you’ll notice wild honeycombs high up on the cliffs (popular for honey hunting / mad honey).
Ultimately, all 3 routes from earlier will lead to Rimche (2,495 m), a popular overnight stop.
Lama Hotel (2,515 m), which is 30-60 minutes further, is even more popular as both ascending and descending trekkers tend to reach here in the evening.
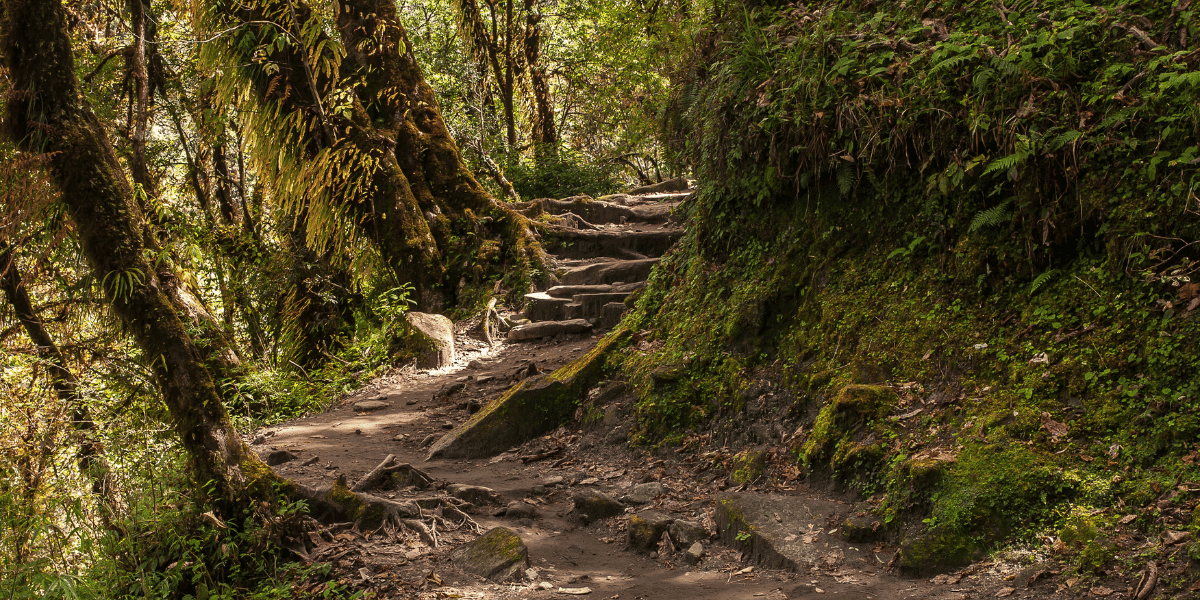
The forest trail continues via Riverside (2,770 m) > Chhunama (2,800 m) > Pering Kharka (3,000 m approx.) until Ghoda Tabela (3,008 m).
Depending on your pace, you’ll get from Rimche to Ghodatabela in 3-5 hours. No section particularly stands out as the hardest, since it’s all a mix of uphills and curved flats.
And it’s generally safe. But that’s not the case during monsoon or extreme weather periods.
The trail between Pairo-Ghodatabela has a few landslide-prone areas. And strong streams/river-crossings form at some parts.
You’ll also cross a wooden bridge right before the forest trail ends. Typically, it’s a small picturesque bridge. But in 2025, the river suddenly flooded in this part and swept away 4 trekkers.
So, some of these parts can become tough and dangerous if you’re trekking in bad weather.
As this is a thick forest area with a lot of wildlife activity, you should also avoid trekking solo or in the dark around here. Stick to daytime hiking!
Reaching Langtang Village
From Ghodatabela, the trail opens up into an open grazing field for horses and cattle.
The initial climb up to Thangshyap (3,140 m) is a bit steep. But after that, the trail gets flatter and more beautiful with every stop.
You’ll pass Tsarting (3,250 m) > Chyamki (3,240 m) > Gumba (3,400 m) > Old Langtang (3,400m) and eventually reach Langtang Village (3,455 m).
The hike from Ghodatabela to Langtang village will take 3-5 hours depending on your pace.
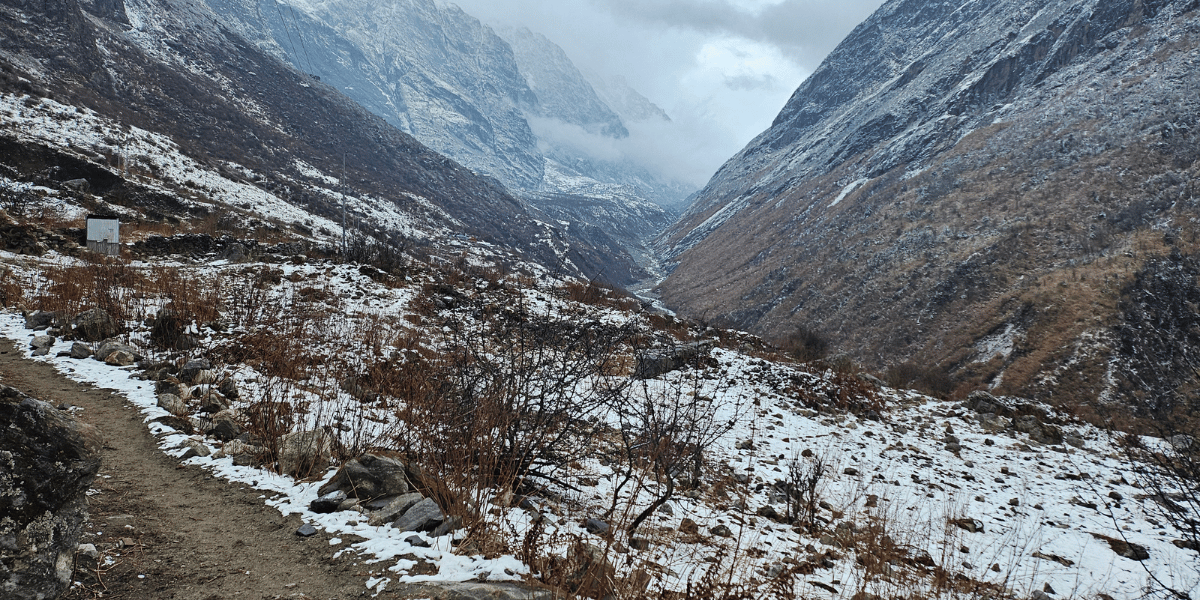
In winter, it typically snows above Ghodatabela. The snow and cold can make this part of the trek tougher/longer. So, just be well prepared.
Anyway, Langtang is a popular place to stay overnight for most trekkers going up. Even if you reach here early, I recommend you stay the night.
It’s good for acclimatization (as many people start feeling the altitude past 3500m).
And Langtang to Kyanjin is also the most picturesque stretch of the entire trek. It’s a walk best experienced in the early, clear hours of the day.
Langtang Valley to Kyanjin
Past Langtang village, you have a relatively flat hike through a beautiful open valley with 6000 and 7000m peaks in front of you. It’s the easiest part of the overall trek for most people.
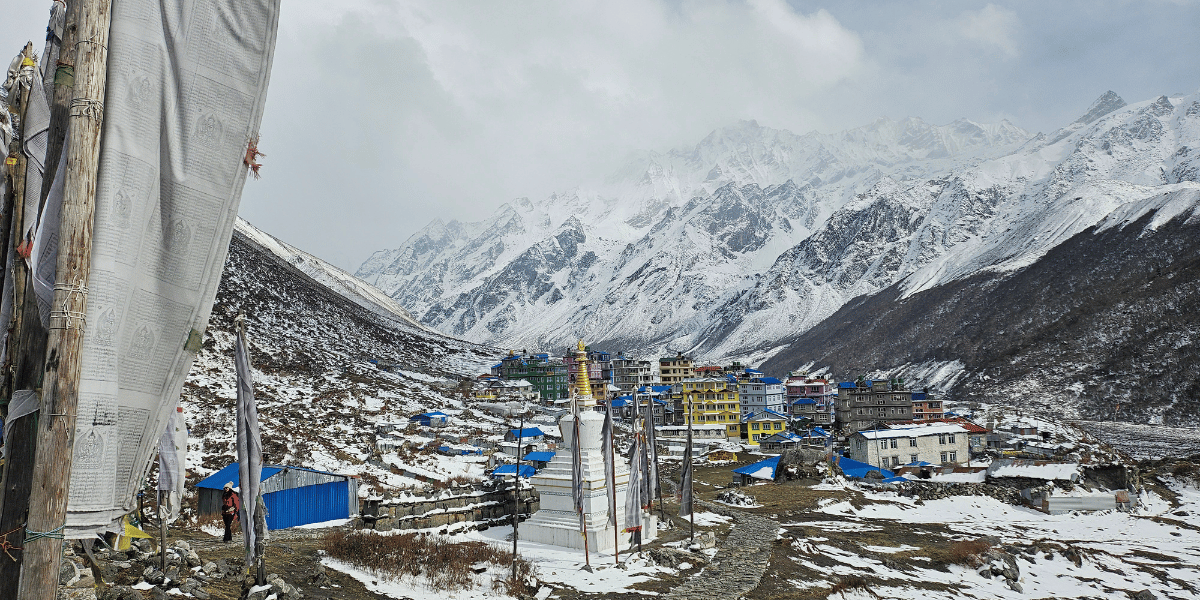
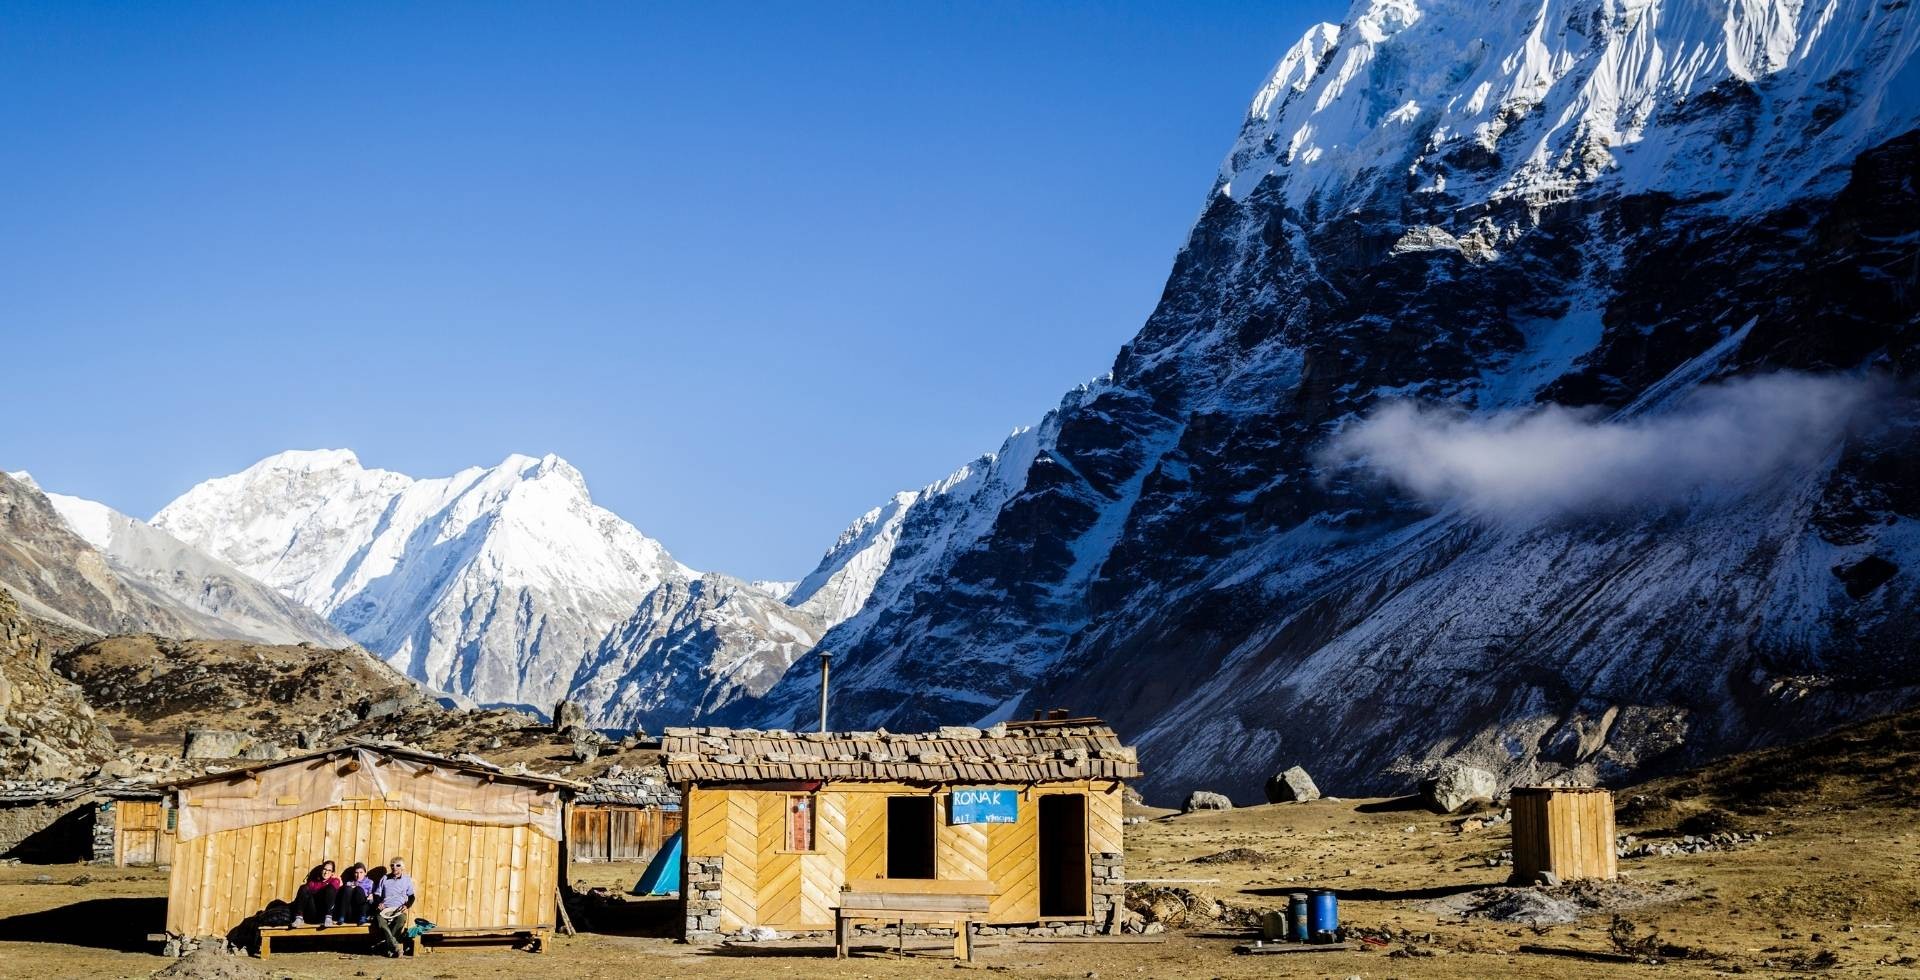
You’ll pass Mundu (3,550 m) > Sindhum (3,555 m) and reach Kyanjin Gompa (3,890 m) in 3-4 hours.
Some people like to hike up to Lirung Glacial Lake (4,000m) after brunch. It’s an easy 1 hour ascent. Others just prefer to rest at Kyanjin and explore the town.
Assuming you’re feeling good, the best option is to hike up to Kyanjin Ri for the sunset. It’s what we aim for with our Altitude Himalaya itineraries.
Viewpoints and Peaks
The next morning, most trekkers get an early start up to their preferred viewpoints.
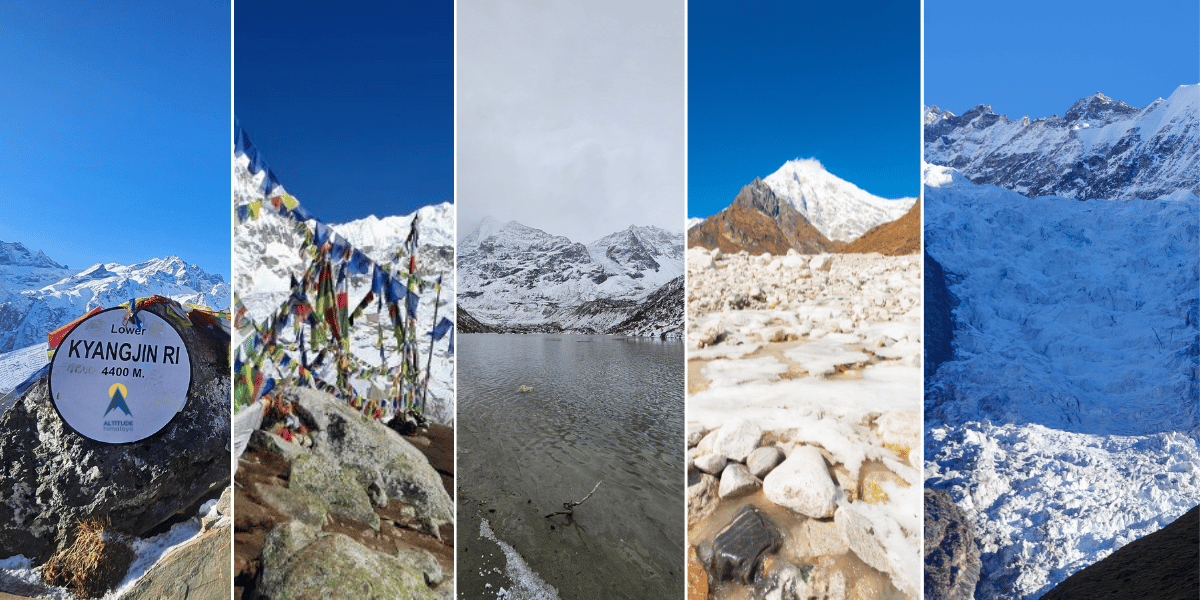
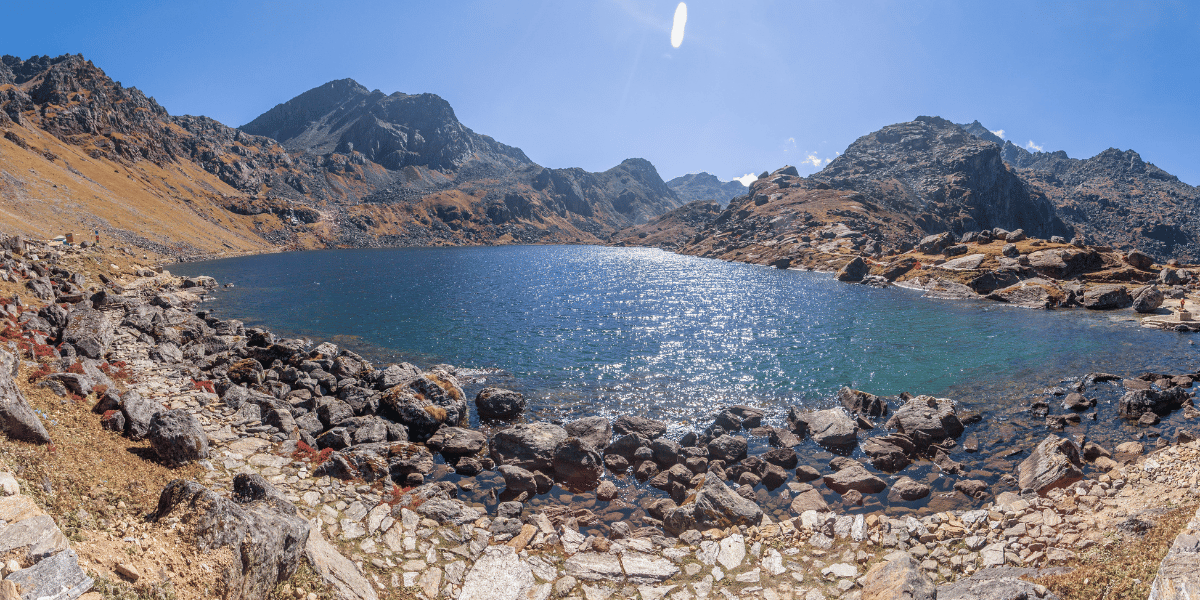
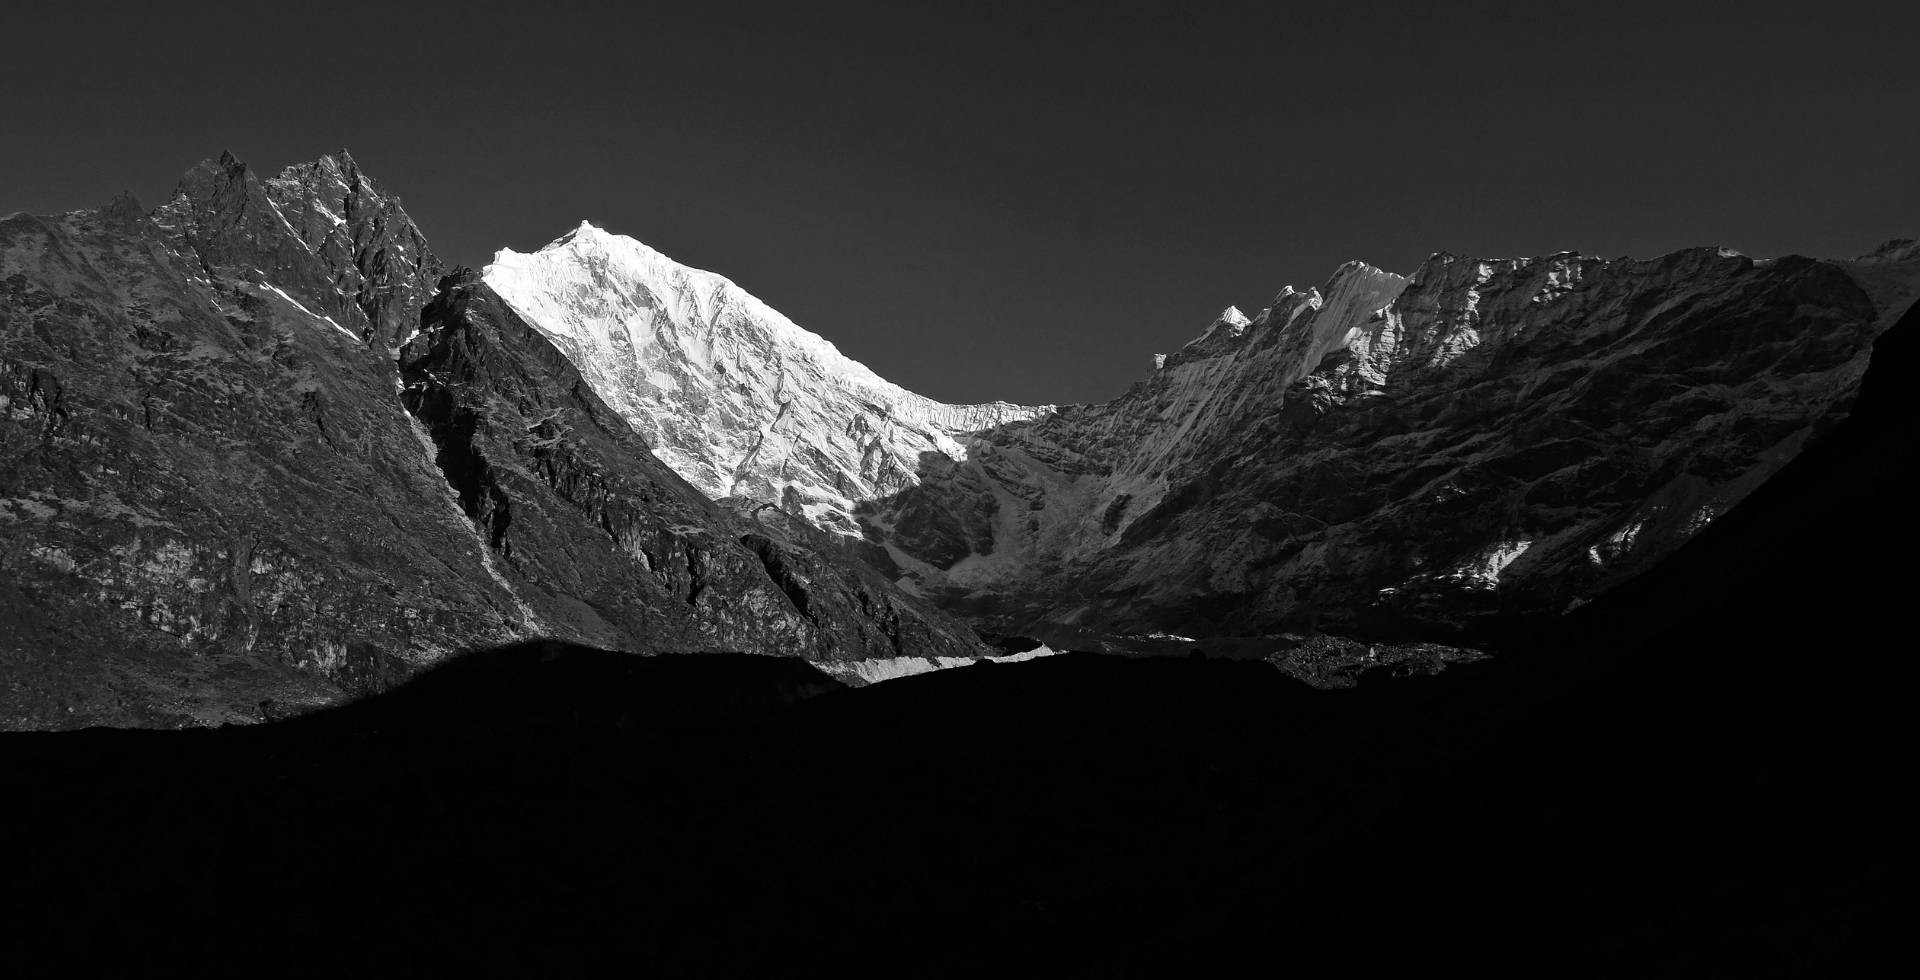
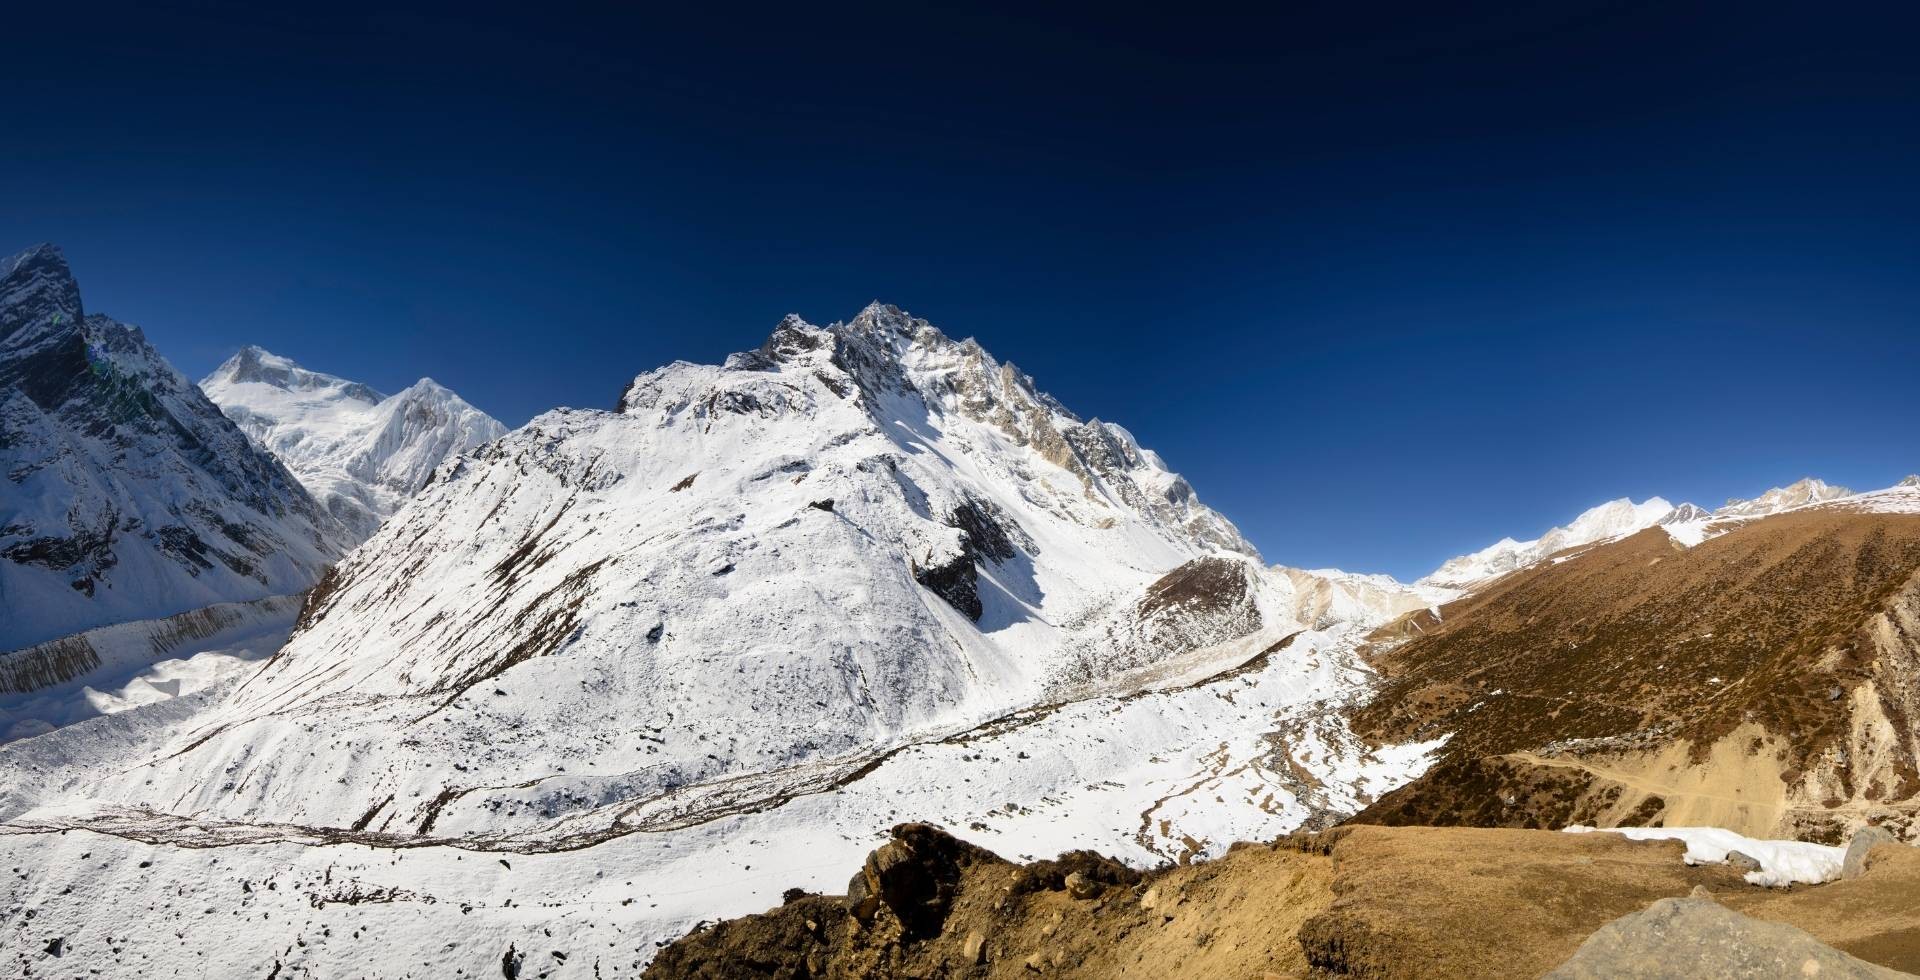
The easiest and most popular hike is Lower Kyanjin Ri (4,400 m). With just a 1-2 hour ascent, you’ll get a panoramic view of most of the surrounding peaks, including Langtang Lirung (7,234 m), Baden Powell (5,857 m), Naya Khanga (5,863 m), Gangchenpo (6,378 m), the ice lake, and more.
One more hour of hiking the same ridge gets you up to Upper Kyanjin Ri (4,700 m). It’s a straightforward climb but the altitude makes it tough, so many people skip this.
The highest viewpoint is Tsergo Ri (4,985 m), and it’s also the hardest. For this, you head east out of Kyanjin and take a different route. It’s a steep 1100m climb that takes 3-6 hours.
Due to how high it is, only well-acclimatized and fit trekkers attempt this, and some turn back from halfway. But a successful summit will give you a lifelong memory and a better panorama with more eastern peaks visible, like Dorje Lhakpa (6,966 m), Loenpo Gang (6,733 m), Langshisha Ri (6,412 m), and Ramthang Karpo Ri (6,865 m).
While they’re all doable in good weather, that’s not the case in winter:
- Lower Kyanjin is often accessible, albeit cold and slippery in winter.
- Upper Kyanjin tends to be risky or just inaccessible due to the snow.
- Tserko Ri becomes very risky and very difficult to attempt due to deep snow.
Besides these, there are a couple of off-the-beaten-path attractions that people often visit:
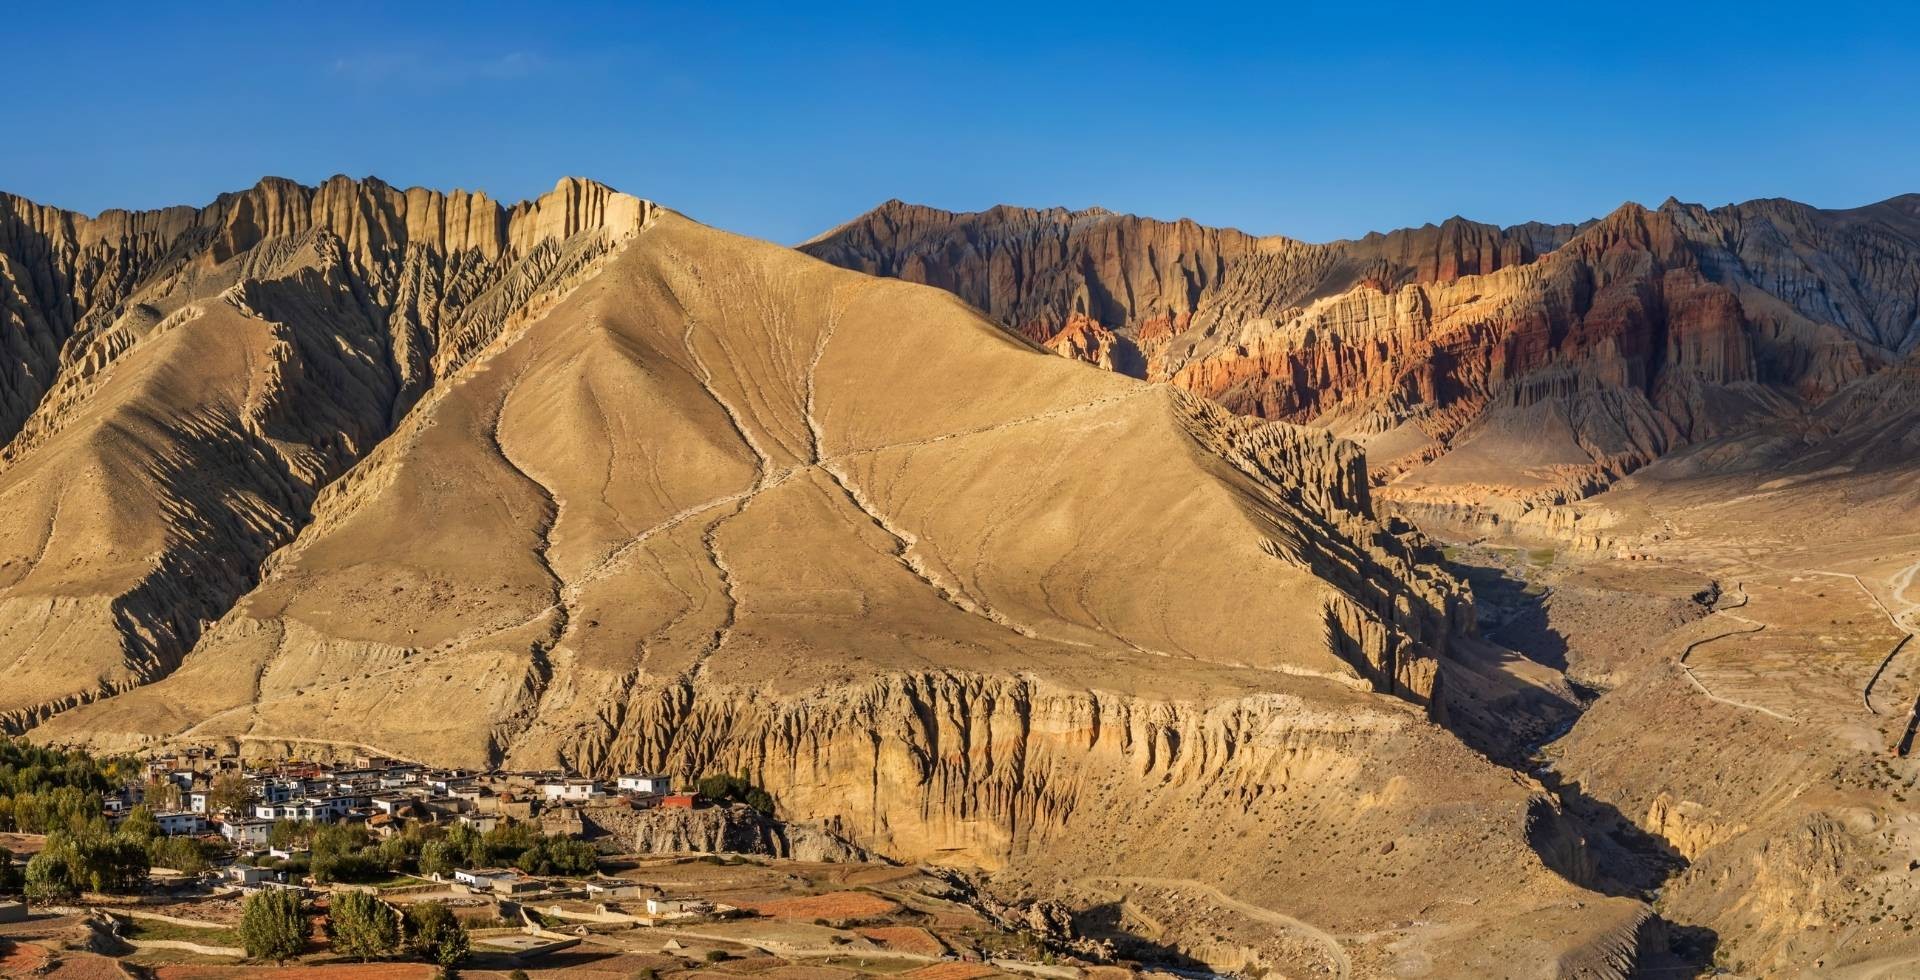
- Yala Peak South (5,520m) - The highest viewpoint that you don’t need a permit for. You need to camp at the base camp for one night and summit the next morning. The route involves basic scrambling in the dry season. In the wet/cold season, you need basic alpine skills and equipment (ropes, ice axes, and crampons) to summit. You’ll spot peaks extending all the way to Tibet, including Shishapangma (8,027m).
- Langshisha Kharka (4,050m) - An alpine grazing pasture 4-5 hours east of Kyanjin. It’s a remote area where all the glaciers converge, perfect for camping and wildlife spotting. This is an easy side hike that can be done as a 1 day round trip.
How to Prepare for the Langtang Valley Trek?
By now, you’ve probably realized - the Langtang Valley trek is an easy trek in ideal conditions, but it can be challenging and dangerous when things go wrong.
So, what can you do to make sure YOUR trek is easy and enjoyable? I’ve talked about that in detail in the sections earlier. But let's summarize them here:
- Fitness makes a massive difference for how easy/enjoyable the trip is. Build up strength (squats/lunges) and endurance (running/cycling) every other day. Even just a few weeks of training before the trek makes a noticeable difference, so don’t skip out on this.
- If you’re older or have joint issues, you may feel knee/ankle pain (especially on downhills). You’ll be exhausted and prone to sprains/twists. So, be ready to take your time and walk at a comfortable pace.
- Prepare mentally for the trek and know what to expect (6 hours of walking with a backpack, basic amenities only, cold, fatigue, bad sleep, low appetite, etc). It’s much easier when things don’t catch you by surprise.
- Season selection is key. Do the trek in the peak seasons for the easiest trekking conditions. Monsoon and winter will make the trek considerably harder. And even in the ‘easy’ seasons, make sure you have good weather windows as mountain weather is quite unstable.
- Plan the itinerary well. 5 trekking days is good for the standard route (both walking pace and elevation gain-wise). Plan rest days if you’re doing a longer route or not in good health. Plan buffer days if you’re trekking in the off season.
- Carry light/portable versions of items made for the outdoors (e.g., 2 merino tops, not 4 cotton tshirts). Choose efficient items instead of overpacking. Make sure your boots are broken-in and not brand new. Make sure you have rain/snow gear according to the season you’re trekking in. Overall, try to pack items so that your backpack weighs under 10-20% of your bodyweight.
- Budget properly for the trek and carry extra emergency cash. Sometimes, you suddenly feel unwell and need help evacuating. Or, you might stay for a few more days than expected (either for rest or exploration).
- The simplest way to make things easier - go with a local operator like Altitude Himalaya. We’re experienced in handling all logistics, including permits, accommodation, transport, guide, porter, budgeting, flights, insurance, whatever you need. And if anything goes wrong, you’ll have a reliable support system you can count on.
Can Beginners Do this Trek? Real Experience Insights!
Yes, with the right preparation, most beginners can complete this trek with ease. But don’t take my word for it.
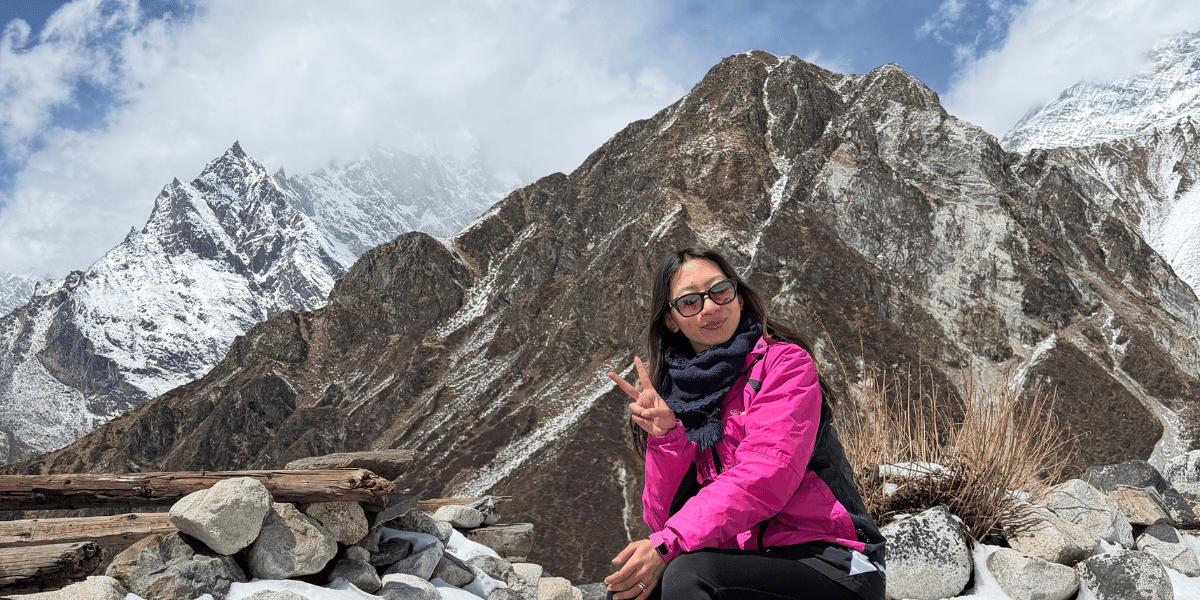
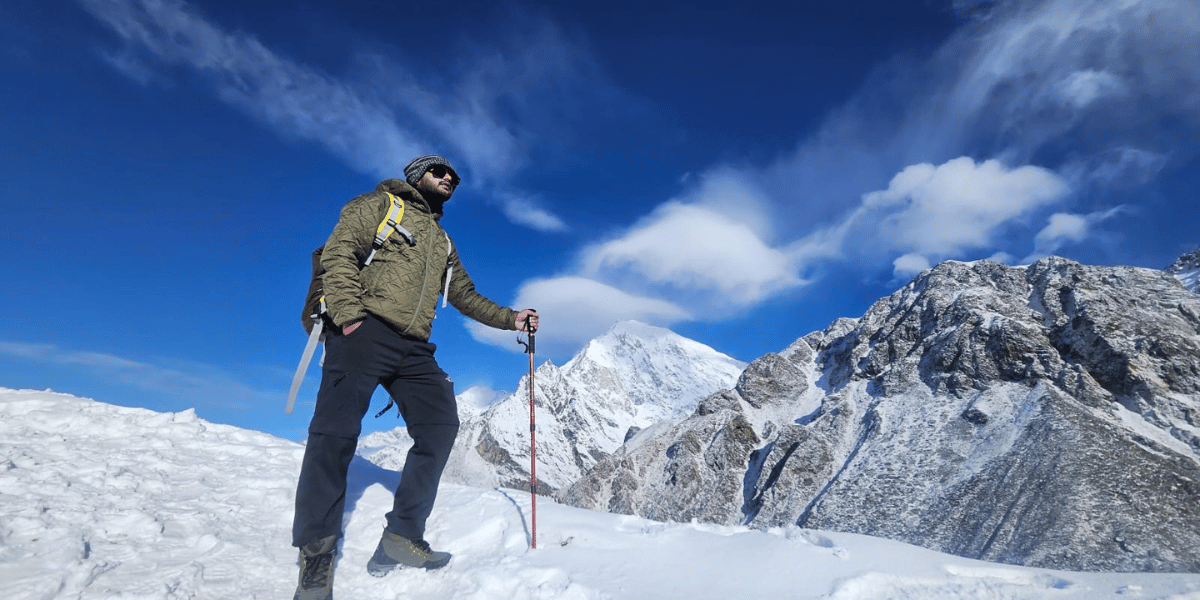
Our team members Suraksha and Rabin recently did the Langtang Valley trek as their first trek. Check out what their genuine experience was like on the trail, in their own words:
- Suraksha: Yes. The simple answer is that beginners can actually complete this trek. But, keeping your health and preparations aside, willpower will eventually turn out to be one of the biggest factors in determining the completion.
- Rabin: Yes, if I can do it, you can do it too. That’s the simplest answer to the doubt many beginners might have about doing the Langtang Valley trek. Although this was my first trek experience, I had done a couple of hikes around Kathmandu, like Nagarjun-Jamacho, Dhap Dam, and Champadevi, with ease. One thing I will have you not mistake is this is not just a simple hike; when there is altitude involved in the play, things get serious.
What Felt Most Challenging?
Suraksha:
Even though I describe the trek as one of the most amazing experiences so far, I cannot hide the fact that the trek was challenging at times. However, I clearly remember the three moments that really tested me, mentally and physically:
- The Walk to Bamboo: I think that the first day felt far more challenging to me than the remaining days of the trek because I realised that my ideas and expectations were not realistic. My usual vacations look far more relaxed, so it did not take long for me to feel the exhaustion take over as we entered deeper into the trails. It took me a while to understand that it was more of a mental reaction than a physical one. So when a colleague told me no matter how fast or slow I walked, I’d still make it to Bamboo and that we didn’t really have another choice. I think that specific dialogue helped me prepare myself for all the walking we would do in the following days.
- Snowfall Before Our Langtang Village Arrival: It wasn’t fatigue or the cold that bothered me the most. It was the fact that we were not expecting snowfall in March, and also that the snow made the downhills look more dangerous. I don’t think that I would have been able to navigate the trail had I been alone. When we entered the dining area, I could see that my fingers were swollen and double their original size.
- The Ascent to Tserko Ri: It had been snowing heavily in Kyanjin Gompa the previous night. Two or three groups were already on their way up, so their footprints would make the trail visible for us. When we walked out of the hotel, we were met with the courtyard covered in layers of snow. As we continued making our way to Tserko Ri, the climb got steeper, and the layers of snow only got thicker, reaching our ankles at different places. I remember giving up about 4 times before I pushed myself to continue. Unfortunately, we couldn’t reach the summit of Tserko Ri, but we did make it to the Lower Viewpoint.
Rabin:
Most of the trek journey was easy and felt like a long multiday hike carrying an 8-10 kg bag. There were two particular days of the trek that drained my willpower like never before:
- Bamboo to Langtang Village: As we stopped for lunch in Riverside/Gumnachok (on Day 2 of our trek), it started pouring and we had to extend our stop until it stopped raining. This unfortunate turn of eventx got us behind our schedule quite a bit. And as we climbed up, it was already snowing and the cold started getting to me slowly. Until we made it to a place called Gumba, it got late and we were out of daylight. We still had around 1.5 km till Langtang Village and a light snow blizzard started. This was almost my breaking point. The darkness, wind, and snow drained my energy and, most importantly, willpower!
- Kyanjin Gompa to Tsergo Ri: The first mistake I made was forgetting to pack my gloves. As it had been snowing for 3 previous days, the weather was freezing, and so were my hands. The other two things that made this day very troubling for me: the amount of snow in the path and the altitude. We had to make our own route, as the trail was not visible over that deep snow and it was tiring as hell. And the altitude, as I crossed the 3500 m, I started huffing and puffing even though I was just taking a few steps at a time. Since we couldn’t go beyond the Lower Viewpoint, we were heading down when another challenge appeared before us: the slippery black ice. It was awful, although I had brought crampons; I shared it with Suraksha. I almost slipped a few times but got down without getting hurt.
The Easy Sections
Suraksha:
When I call these places “easy”, it’s more than just the trail; it’s also about the atmosphere:
- Pering Kharka: I had one of the most pleasant walks at Pering Kharka before we reached Ghoda Tabela. There were a few spots on the trail that felt steep, but walking through the moss-covered forest with the stream flowing next to us, everything felt fresher at that moment.
- The Trail to Kyanjin Gompa: With regards to the climb and difficulty, I think this part was definitely one of the easiest. The trail was a little rocky, but the climb felt easier.
- Kyanjin Gompa to Lama Hotel: The weather deserves a significant amount of credit for making it all easier. The majority of the 18 km included walking downhill. After completing all the tough ascents, the walk back to Lama Hotel definitely felt more forgiving.
Rabin:
Besides day 2 and day 4, all other days were relatively easy for me. Among them, I would say these were the easiest:
- Langtang Village to Kyanjin Gompa: It was the easiest among the other days because this was the shortest (around 6 KM) and the trail was mostly flat.
- Kyanjin Gompa to Lama Hotel: Though it was the longest of all the journeys, I don’t know if it was the excitement to get back home or because it was mostly downhill; we were getting down fairly easily and on pace.
How Altitude and Fitness Played Out
Suraksha:
The first day certainly felt tiring, but I guess I got the hang of it by the second day.
Thankfully, my body handled the altitude well. However, the elevation did affect my sleep, as I knew that my body wasn’t fully rested. I woke up a couple of times in the middle of the night, but overall, I was rested enough to complete the trek without any serious complications.
The only physical-level difficulty I felt was on our last day at Kyanjin Gompa. Since I could feel that my toes were extremely cold throughout the night and we had to reach Lama Hotel the same day, I decided to stay back (instead of heading to Kyanjin Ri in the morning as per the original plan).
Rabin:
To be honest, I thought the Langtang Valley Trek was going to be a piece of cake for me, as I was a physically active person who likes to walk. But reality hit me hard!
On day 4, after we came back from Tsergo Ri, I suffered from a mild headache that got a little worse, and I started feeling nauseous.
That’s when it hit me that these were the symptoms of Altitude Sickness. I had some garlic soup, which was a saviour. After an hour of gulping the soup down, the symptoms disappeared as if they were never there!
Mistakes We Made
Suraksha:
If I had to look back and think about the mistakes that I made, there’s one in particular: not carrying a handkerchief.
As we went to higher regions, I got the worst runny nose. The constant use of facial tissues irritated my skin and rubbed off the sunscreen. I came back with a sunburnt nose, which took me more than a week to recover from.
Rabin:
The gloves that I missed cost me a lot on day 4. Even though this was the only thing I forgot to pack, I was quickly reminded that I should have double-checked my packing list!
Experience-Based Tips From Two Beginners to Others
Suraksha and Rabin:
- Plan for the trek at least 15 days before. This will let you explore ideas and gather information and resources, which will definitely come in handy.
- Check the weather. The weather conditions will make a significant difference in how rewarding the trek is going to be and will be helpful to prepare for different weather conditions you are going to face during the trek.
- Don’t underestimate the altitude. If you are getting some symptoms of altitude sickness, let your friends know and try to get back down as soon as possible
- Reapply your sunscreen every now and then. Almost every hour, if you can.
- Don’t forget glasses and neck buffs/gaiters.
- Carry plenty of packets of electrolytes. You might not like the taste of it, but it is going to fuel you whenever you’re tired.
- Don’t trek solo if you are trekking for the first time.
- It’s okay to walk at a slower pace rather than forcing yourself to catch up with others and burn yourself out.
- Do double check your bag and don’t overpack too!
Who Should NOT Do This Trek?
The Langtang Valley Trek is one of the most accessible treks in Nepal. I’ve seen children, amputees, and 80-year-olds do it. However, that doesn’t mean EVERYONE can/should do it, especially not without the correct preparation.
For instance, I once saw a couple bring an infant on the Annapurna Circuit. I’ve seen first-hand how rough altitude sickness can be, even for adults that knew what to expect and how to avoid it.
As a trekking guide, I would never recommend bringing infants to a high-altitude trek when they can’t even understand or communicate how they’re feeling.
There are many such risks to consider. In short, here’s who I think should NOT do this trek:
- People with infants: Just because someone else on the internet did it doesn’t mean you should too. Things can go very wrong very fast and help isn’t always available in remote trekking areas. Children above age 3-4 are fine, but with infants, go for a safer, less remote trek like Pikey Peak, Ghorepani Poonhill, Dhampus Hike or a Family Vacation package.
- People with serious health conditions: Like I said earlier, conditions like Asthma, heart problems, severe allergies, Diabetes can quickly deteriorate in a high-stress low-oxygen environment. Consult with your doctor and/or insurance provider, and communicate first-aid/rescue protocols with your guide and trek operator before doing this trek.
- People in bad shape: If you have severe joint issues or your endurance is awful right now, you might regret the trek. We have some amazing vehicle tour packages like the Upper Mustang 4WD tour that you might prefer.
- People looking for 8000m peaks: From Yala Peak, you’ll get a distant view of Shishapangma. But that’s about it. The rest of the peaks in the Langtang region are in the 6000-7000m range. For massive 8000m peaks, we recommend treks in the Everest, Annapurna, and Manaslu regions.
- People looking for basecamps: Climbing season basecamps on popular peaks like Everest and Manaslu are basically a small town. They span kilometers and are absolutely massive. A lot of people come to see what they’re like and often camp nearby. Langtang is not an expedition region, so don’t expect massive basecamps.
- People with a rushed itinerary: People often have 4-5 days remaining in Nepal and try to fit this trek in that timeframe. Don’t do that. You’ll be walking from morning to night with no time to rest or enjoy the trek. And there’s a high chance of altitude sickness. Go for a Heli Tour or a shorter trek nearby.
- People with no planning: A MAJOR mistake that mostly Nepali first-time trekkers make. You won’t enjoy the trek much if you have no idea where you’re going, staying, or what to expect. And this can be life threatening during bad weather. Trekkers die or have to be rescued every year because they ignored extreme weather warnings and travel anyway.
Combining With Other Treks: How Does It Add to Difficulty?
Most people do the standard Langtang Valley route (Syabru to Kyanjin and back), so I’ve mostly focused on that for this article.
But the region is a LOT bigger than just the valley, and there are a lot more routes for locals and experienced travellers to explore.
Here’s how you can combine the Langtang Valley trail with other routes in region and how that affects the difficulty and overall experience:
Langtang Gosainkunda Trek:
- Extra 3-4 trekking days. When returning from Langtang Valley, the trail continues from Domen (1,565 m) to Suryakunda (4,610 m). It’s a steep ascent, which is never easy. But you’re well acclimatized by now, so the altitude doesn’t affect you much.
- Takes you to the Gosainkunda lakes cluster, a group of 108 alpine lakes with a lot of history and religious significance for Hindus and Buddhists.
- Spectacular views of the Ganesh, Manaslu, and Annapurna ranges, which you wouldn’t get from Langtang Valley.
- Receives the biggest influx of religious pilgrims on every Janai Purnima (August).
Tamang Heritage Trail:
- 4 days of lower-altitude trekking done from Syabrubesi. Easy hikes that help you acclimatize for Langtang Valley.
- This trail receives very few outsiders. So, you get a genuine look into village life and Tamang culture rather than commercialized trekking settlements.
- Ideal route to experience homestays, quiet village trails, and Nepali hospitality.
- Closest views of the Ganesh and Kerung mountain ranges, with distant views of Jugal range.
Langtang + Panchpokhari Trek:
- Combines the Langtang trek with Panchpokhari Trek via Tilman pass (5,320m). Can be done clockwise or CCW.
- Typically adds 5-7 trekking days. This route is only for experienced trekkers with a support team and camping equipment. NOT for beginners or solo.
- 2-3 days of remote camping is needed to cross Tilman pass, one of the most difficult mountain passes in Nepal. Not doable in winter or bad weather.
- The rest of the trek is pretty standard, doable by most people.
- You travel to the Panchpokhari lakes - 5 sacred lakes with religious importance.
- The area is a very popular monsoon trekking destination for wildflowers.
Langtang + Helambu Trek:
- Combines the Langtang trek with the Helambu circuit via Ganja La pass (5,130 m). Usually done clockwise, starting from the Kyanjin.
- Everything is the same as above - difficult high pass that requires a support team and remote camping. Can’t be done in the off season.
- Takes you to Ama Yangri peak (3,772 m) which offers a panoramic view of Ganesh, Langtang, Jugal, Gaurishankar, and Everest ranges.
You’ll pass through villages like Sermathang and experience more of the Hyolmo culture and lifestyle.
Final Thoughts: Is Langtang Valley Trek For You?
Overall, the Langtang Valley Trek is a moderate difficulty trek accessible for most people.
Our fit and experienced team members find this trek easy to do and easy to recommend, especially in good weather.
But I’ve also heard from first-timers and people who went in the off season that some sections were challenging. So, if you’re new to this, plan well and take your time.
Either way, you’ll be surrounded by 6000-7000m peaks (especially at Kyanjin) and get a glimpse into the local Tamang culture.
Remote camping and peak climbing are available for those interested. They add to the difficulty but they’re well worth it.
If you want to explore more of the religious and cultural aspects, trails like Gosainkunda and Tamang heritage are close by.
Check out our other Langtang Valley trek blogs and you’ll be well prepared to plan the perfect trek. Or, let us handle everything, and just sit back and enjoy!


 Anup Thapa