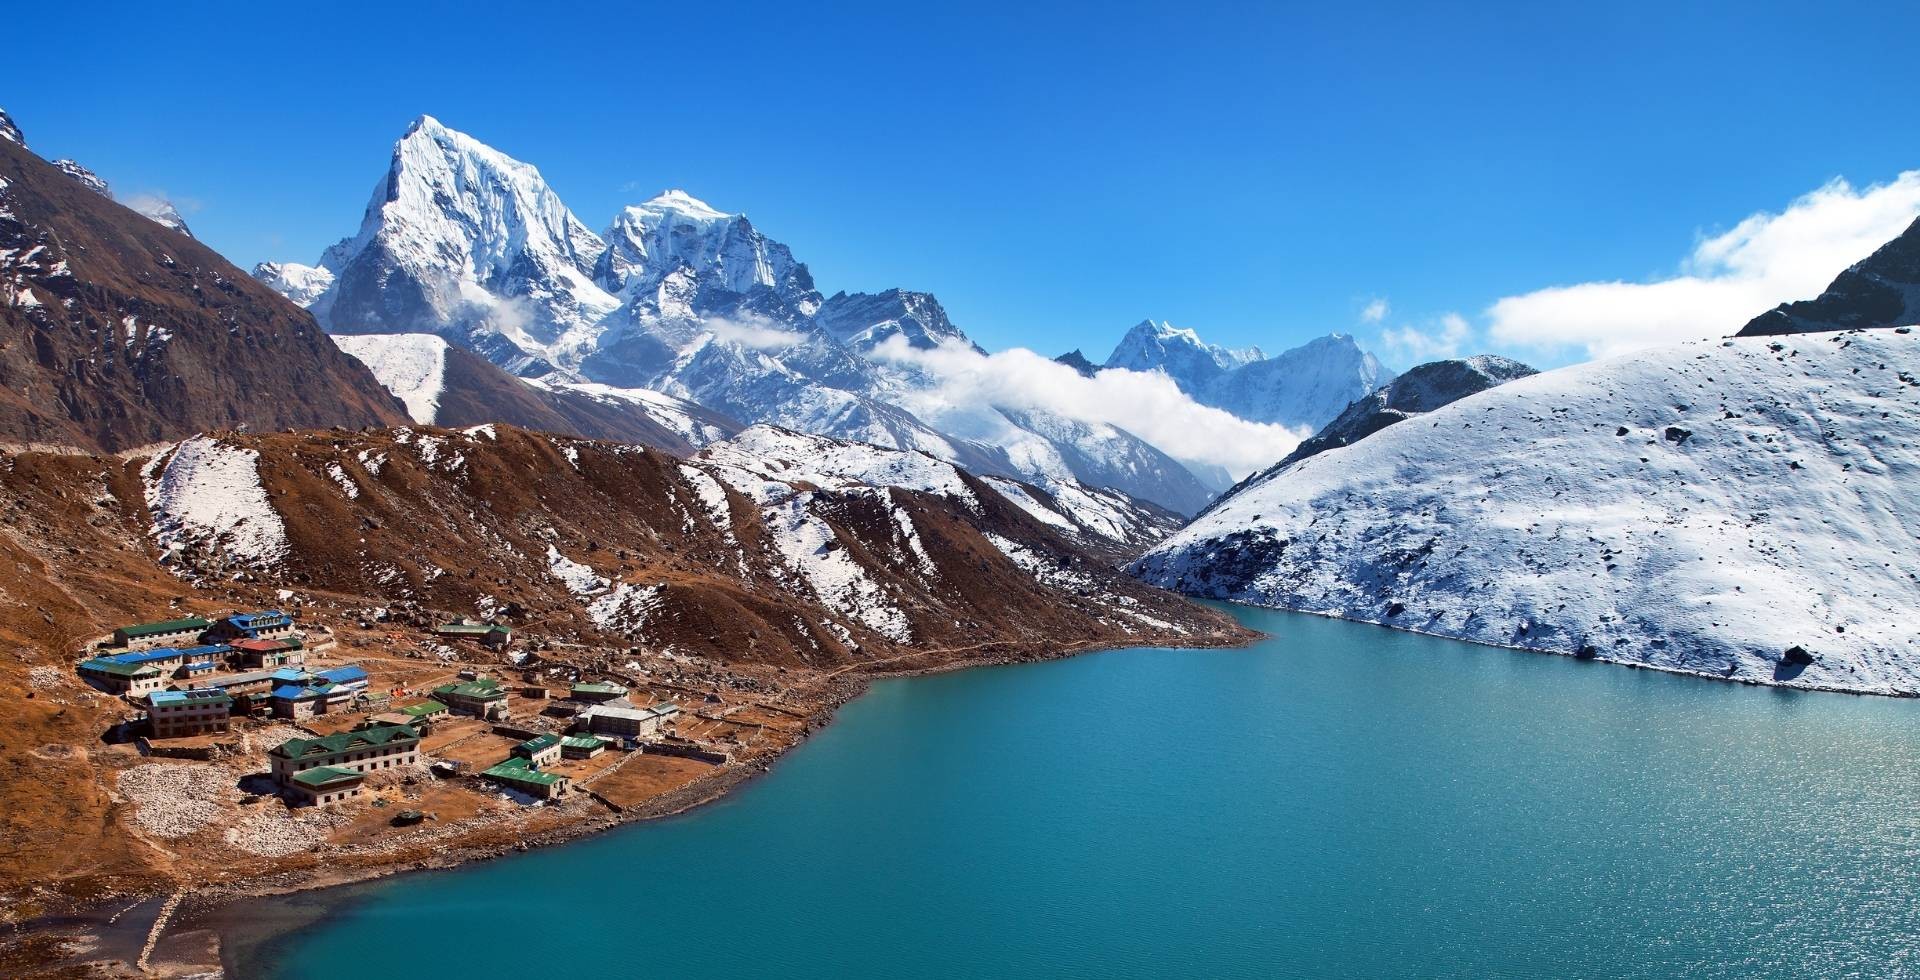
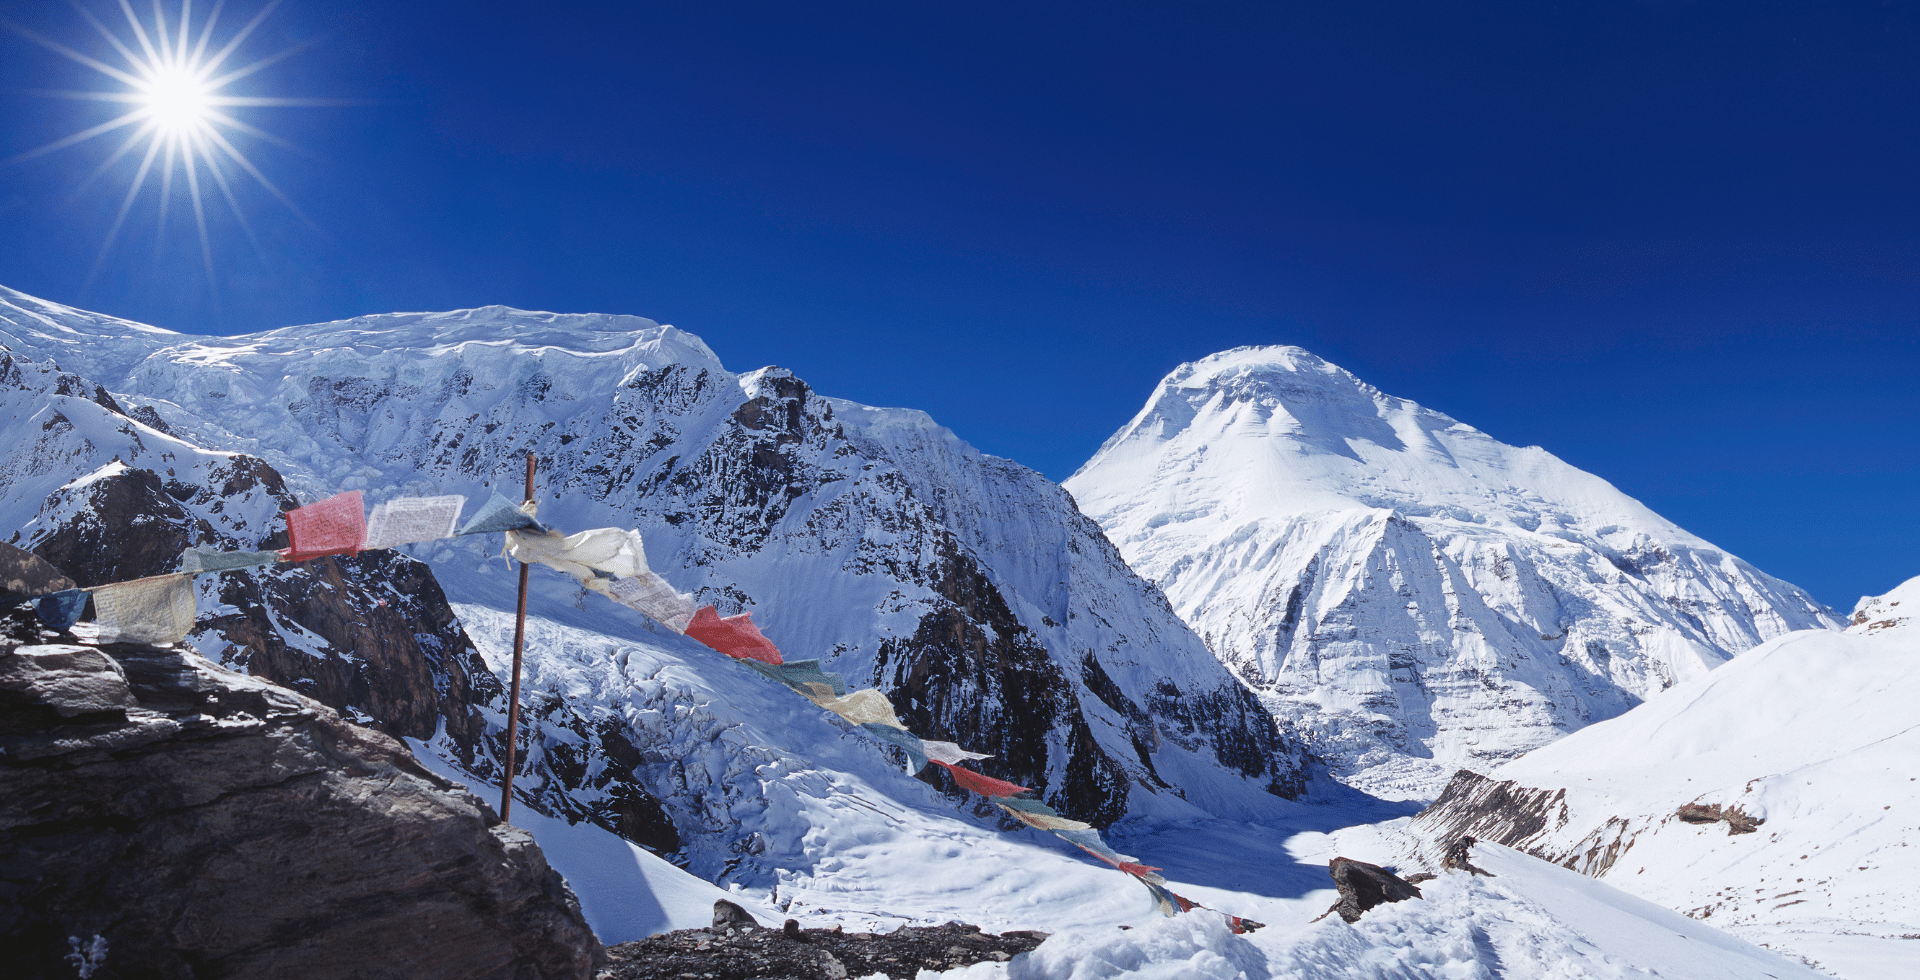
The locals who live in the Langtang National Park have a belief that Langtang Valley was blessed by Guru Rinpoche, and if seeing is believing, then I have to say that it must be true.
Unless you are willing to spend a couple hundreds of dollars on a helicopter ride to Kyanjin Gompa, the only way you can reach this blessed valley is by trekking, and this blog has been written to assist you in packing for your Langtang Valley Trek.
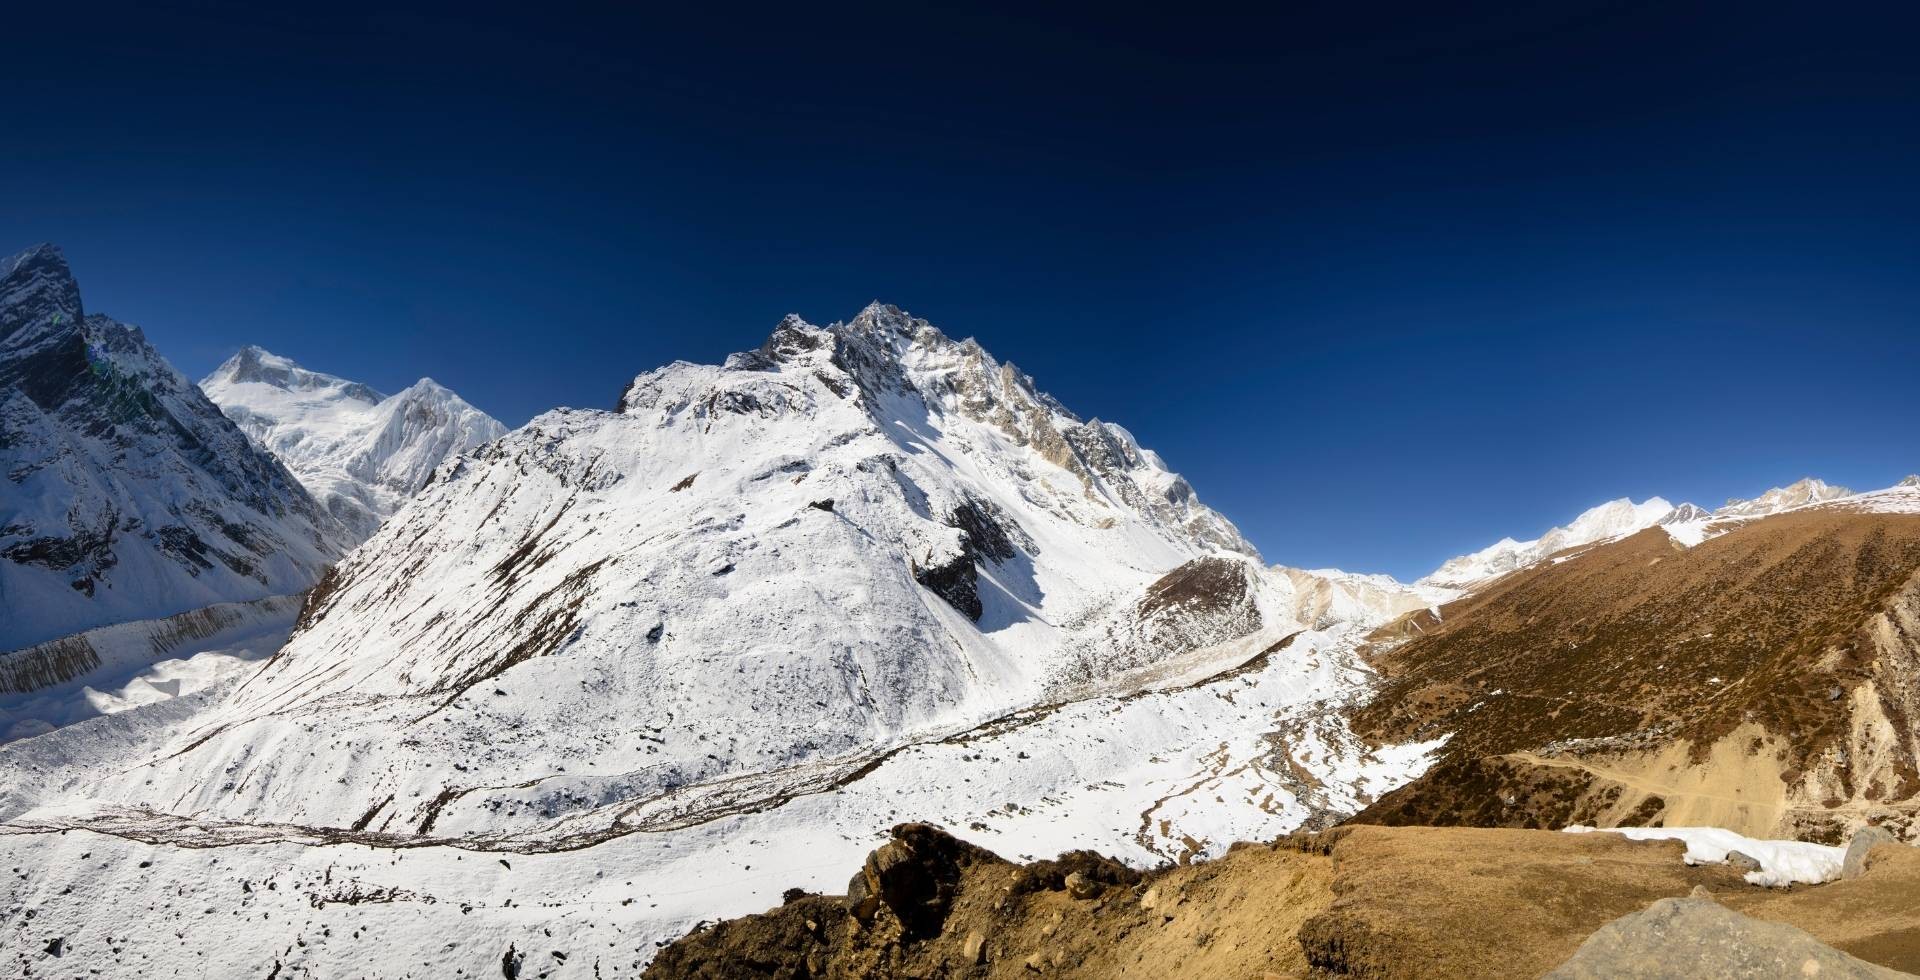
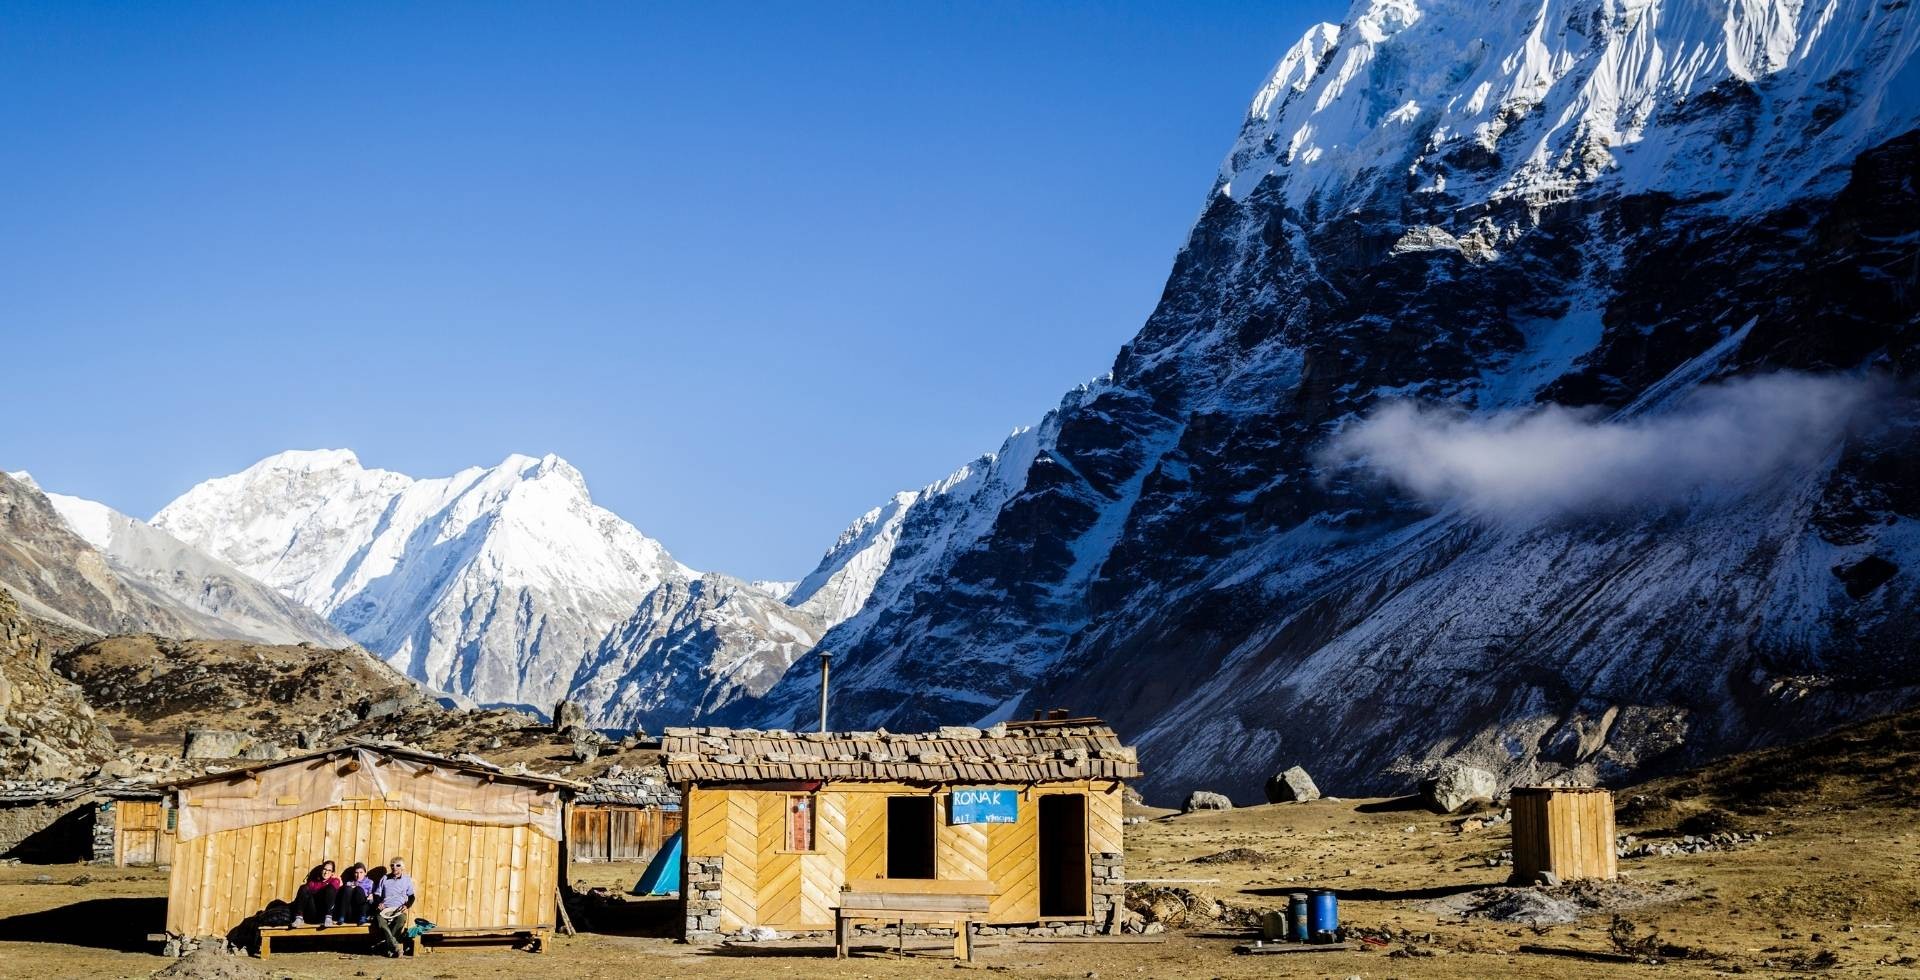
The trek starts from Syabrubesi / Syaphru Bensi from where you will explore all the hidden gems of the valley until you reach Kyanjin Gompa. And throughout this time, you will be spending your nights at higher-altitude destinations.
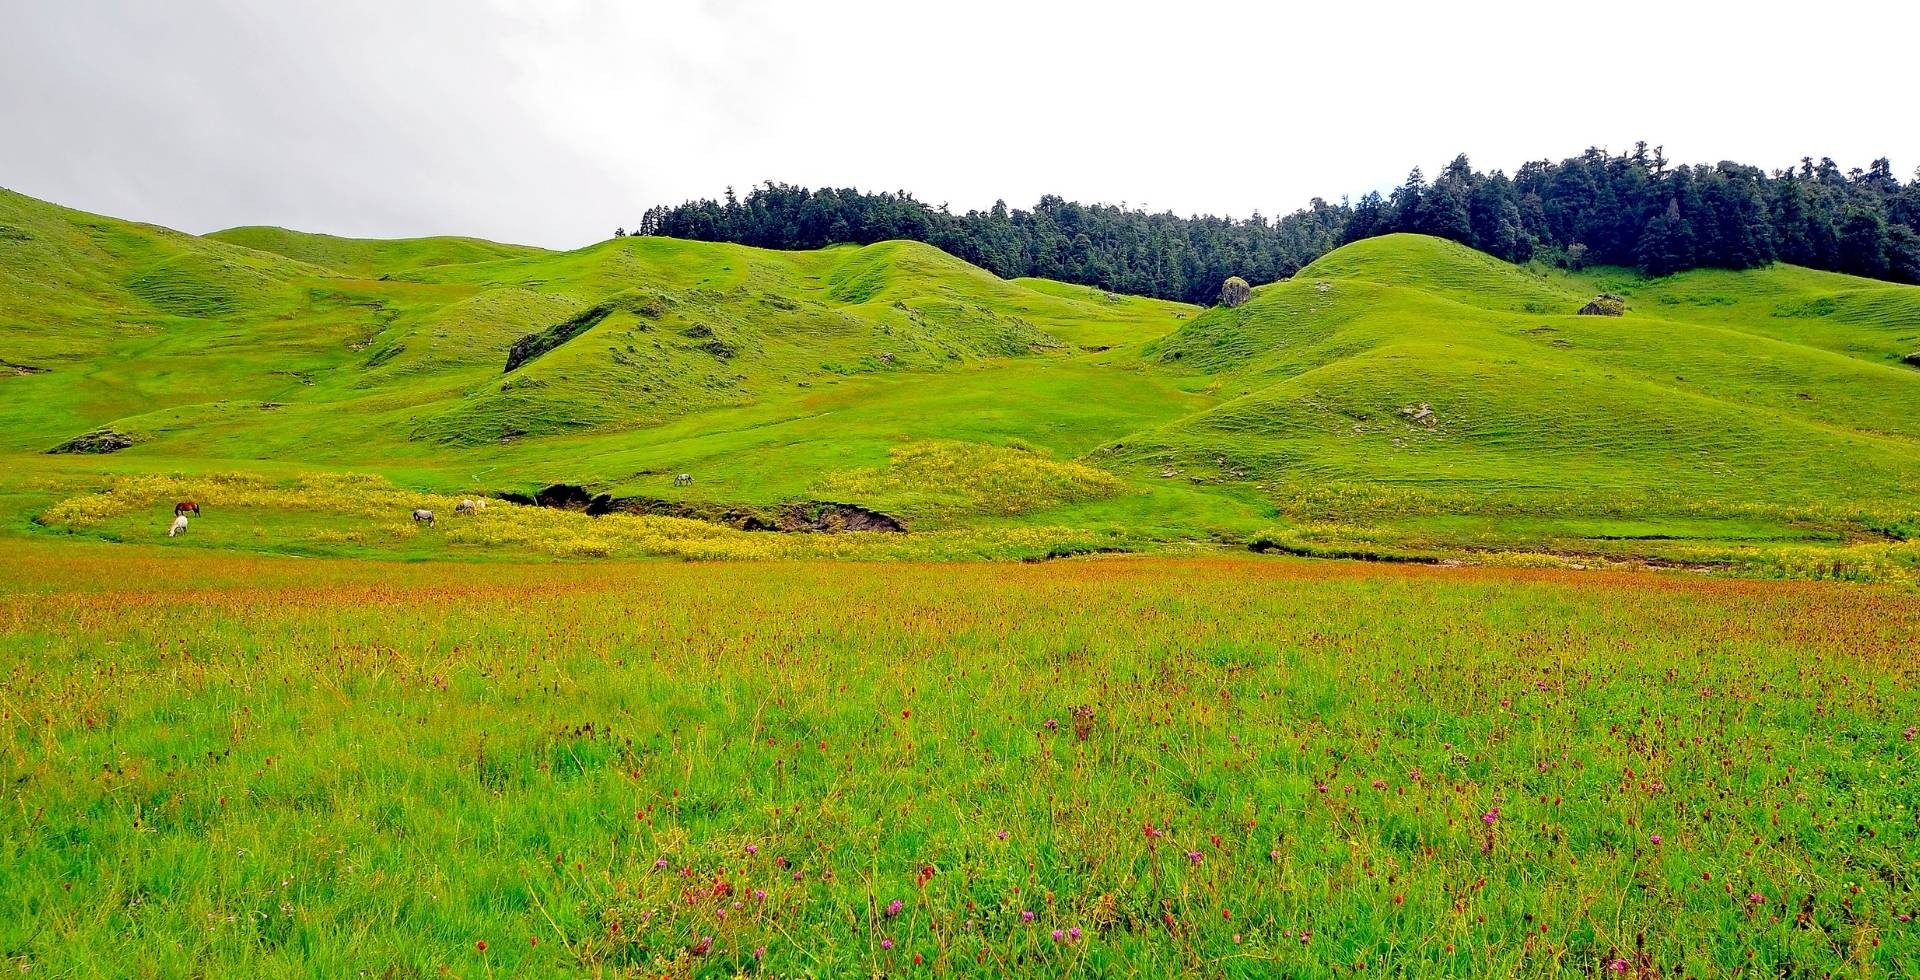
This means, within a 6-to-7-day-long trek (which is the ideal number of days for Langtang Valley Trek), you will be coming across different weather and temperatures as you move across different ecological areas.
For this reason, you must be prepared for your Langtang trek in every way possible, and this can only be made possible with proper planning and proper packing. So let’s move on with the latter part, “proper packing”.
Your Packing List for the Langtang Valley Trek
Let’s dive straight into the topic of the article – packing for the Langtang Valley trek. To make it easier for you to understand, the items have been divided into different categories.
Please feel free to paste them into your checklist to ensure that you do not miss any of the required items.
Trekking Bag and Daypack
You cannot start packing for a trek unless you have a bag to pack the things in, and here is why your choice of trekking bag and daypack is very important.
- Trekking Bag/Rucksack: First things first, you will need a durable waterproof trekking bag. If you are going for a low-budget choice, your options are polyester and nylon that have been coated with PU.
If you can stretch for a higher budget, then go for materials like Dyneema or X-Pac. Apart from that, your bag should have a rain cover because you never know what the weather brings you in the Himalayas. Don’t forget this if you are trekking around early spring or summer.
Choose the size of the bag based on your needs, but remember that the weight of the bag should be no more than 15% to 20% of your body weight.
- Daypack: You will need a daypack if you want to explore Langtang Village or go for a side hike from Kyanjin Gompa to Tsergo Ri or Kyanjin Ri. Once you check into your hotel, there is no point in carrying the entire trekking bag wherever you go.
Choose a small and comfortable daypack where you can carry your essentials like water bottle, lunch, cash, permits and documents (if you have safety concerns at the teahouse), etc. Just make sure that your daypack is lightweight and water-resistant.
Now that this has been covered, let’s start packing!
Clothing
When it comes to packing your clothes for the trek, there’s one thing you need to keep in mind — layering is the solution. Since the ideal number of days suggested for the Langtang Valley Trek is 6 to 7 days, the clothing items have been provided based on that duration (and my personal experience).
Base Layers:
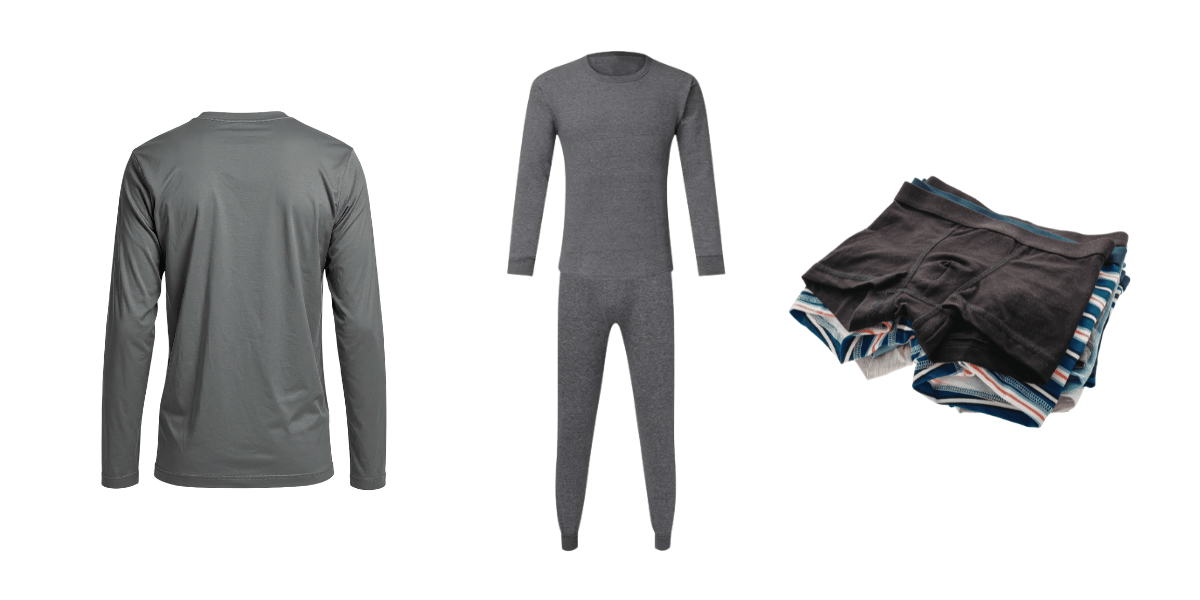
These are innermost clothing items that you will wear to maintain the moisture and warmth in your body. Here are the base layers that you will need to carry for your trek:
- Tops (2): Carry two lightweight tops, preferably full-sleeved ones. If you are trekking in the spring, you can go for polyester tops as they dry faster. In case you’re planning to go in the autumn, go to tops made from merino wool, which absorbs 30% of the moisture and keeps you warm enough for the trek.
- Thermal bottom (1): Make sure that you always carry thermal pants/leggings. Even if you don’t wear them while trekking in lower altitude regions, they will come in handy while pushing to Tserko Ri’s summit and while sleeping/resting in Kyanjin Gompa. (If you want, you can also carry an extra thermal top, especially for winter, late autumn, and early spring.)
- Undergarments: When it comes to undergarments, always go for a synthetic blend, as cotton gets wet faster and dries slower. Carrying undergarments equal to the number of trekking days is always a great idea.
Sports bras are highly recommended for women, as they provide better support for posture and more comfort during active hours.
Mid-Layers:
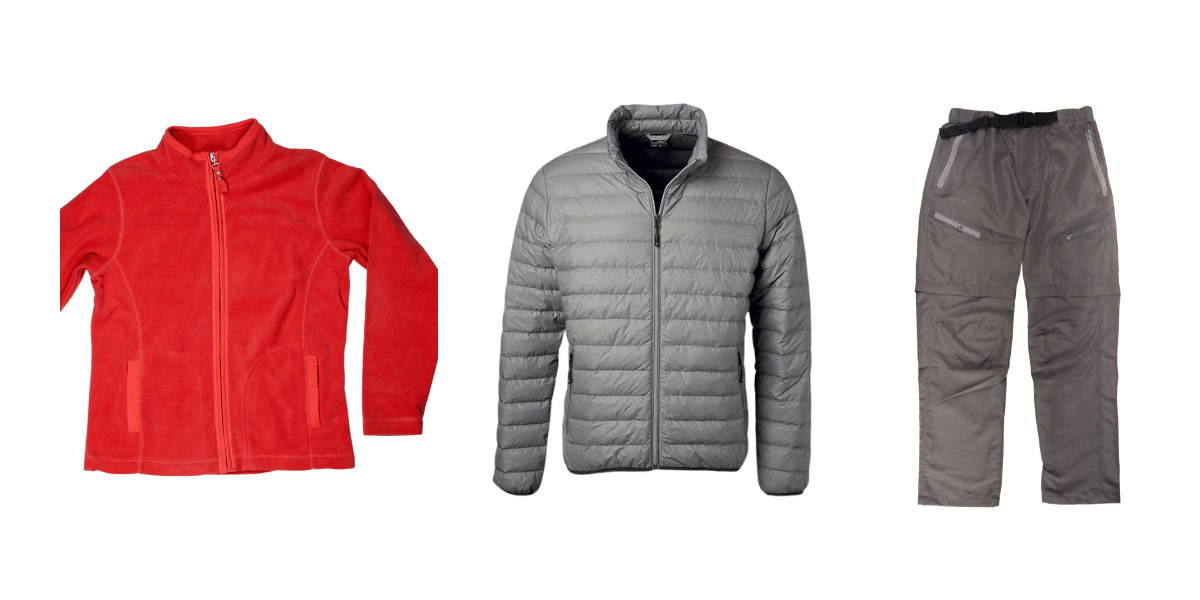
Mid-layers are the insulating layers of your outfit. Now these come in handy even when you are trekking in low-altitude regions like Bamboo and Lama Hotel, as the temperature can significantly drop in the evening.
Although its main purpose is to trap the body heat, it can be useful in mild weather as well. Here are the mid-layers that are recommended for your Langtang Valley Trek:
- Fleece Jacket (1): Trust me when I say this, you will need your fleece jacket once you reach Ghoda Tabela (3,008 m). After your choice of base layer, it is going to be your mid-weight fleece jacket that is going to keep you warm and maintain the moisture in your body.
- Lightweight Down Jacket (1): Compared to fleece jackets, down jackets are certainly lighter; however, you are highly recommended to carry both. Even if you don’t wear your down jacket while trekking, it is unbeatable when it comes to staying warm while resting.
Early mornings and evenings can be colder once you reach Kyanjin Gompa, and you will thank your down jacket while you chill around the teahouse or visit the local bakeries.
- Trekking Pants (1 or 2): A softshell trekking pant or two, this is something that you cannot go wrong with. Make sure that your trekking pants (nylon or polyester) have a blend of spandex, making them stretchable and more comfortable for movement.
Having softshell trekking pants can give you just enough protection from cold wind and light rain. And if you have convertible trekking pants, then there’s another plus point, as you can change the length according to the weather and the temperature.
If you want to switch to trouser, make sure that the materials are suitable to be used as activewear. Trousers that have a blend of merino wool can be a great choice to resist the cold.
- Shorts (optional): Since we went during early spring, on the drive from Kathmandu to Syabrubesi and until our hike to Bamboo, I opted for shorts. So if the weather is good, shorts are not a bad idea, to be honest.
Outer Layers:
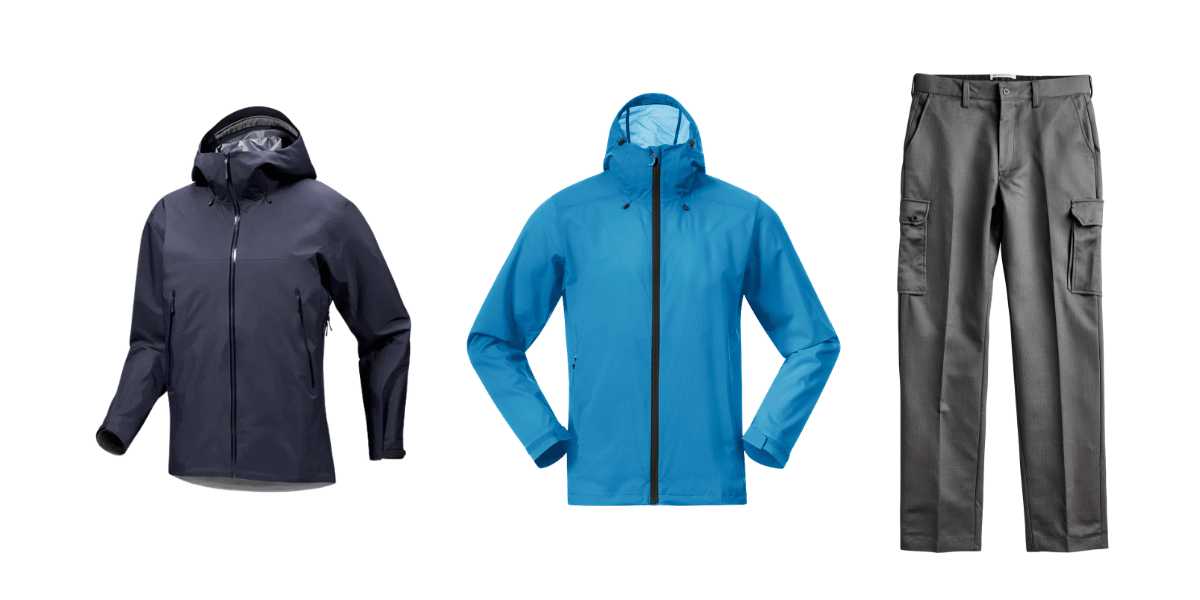
Since the softshells have already been included for mid-layers, hardshells are what you should go for when it comes to choosing your outer layers. Why? Because the outer layers of your outfit are meant to protect you from harsh conditions.
This means that your outer layers should withstand heavy rainfall, snowfall, and strong winds. You can never be sure with how unpredictable the weather can be near the mountains. Given below are some suggestions for your outer layers:
- Heavy Down Jackets (1): If you are planning on going all the way up to the summit of Tserko/Tsergo Ri, then a heavy down jacket is a non-negotiable. Even if you don’t plan on hiking up to Tserko Ri but wish to spend some days at Kyanjin Gompa, then this jacket will keep you warm through its extremely cold early mornings.
Feel free to skip this if you are planning to do the trek during late spring. For the Tserko Ri and Kyanjin Ri summit in the late spring, you can layer your lightweight down jacket with a good windproof jacket.
- Windproof and Waterproof Hardshell Jacket (1): While your heavy down jacket provides you with maximum warmth, your second hardshell jacket is needed to protect you from unexpected rainfall and snowfall that are common in the mountains.
In such situations, go for GORE-TEX as I give you the best guarantee against harsh weather conditions. They are breathable, ensuring that you are comfortable throughout the hike.
Want more options? Pertex Shield is another ideal material for your trekking jackets. A windproof jacket is a must no matter what the season is.
- Hardshell Trekking Pants (1): Similar to your hardshell jacket, your hardshell trekking pants should be waterproof and windproof. Once again, my best choice for these pants is GORE-TEX and I recommend the same.
And even if your hardshell pants are not insulated, don’t worry, as they are meant to be worn over your base layers or mid-layers. Once again, if you have a thermal bottom and windproof trekking pants for your mid-layer, you can consider skipping this during late spring and early autumn.
So, have you made your checklist for your clothings? And do you have these essentials?
Footwear
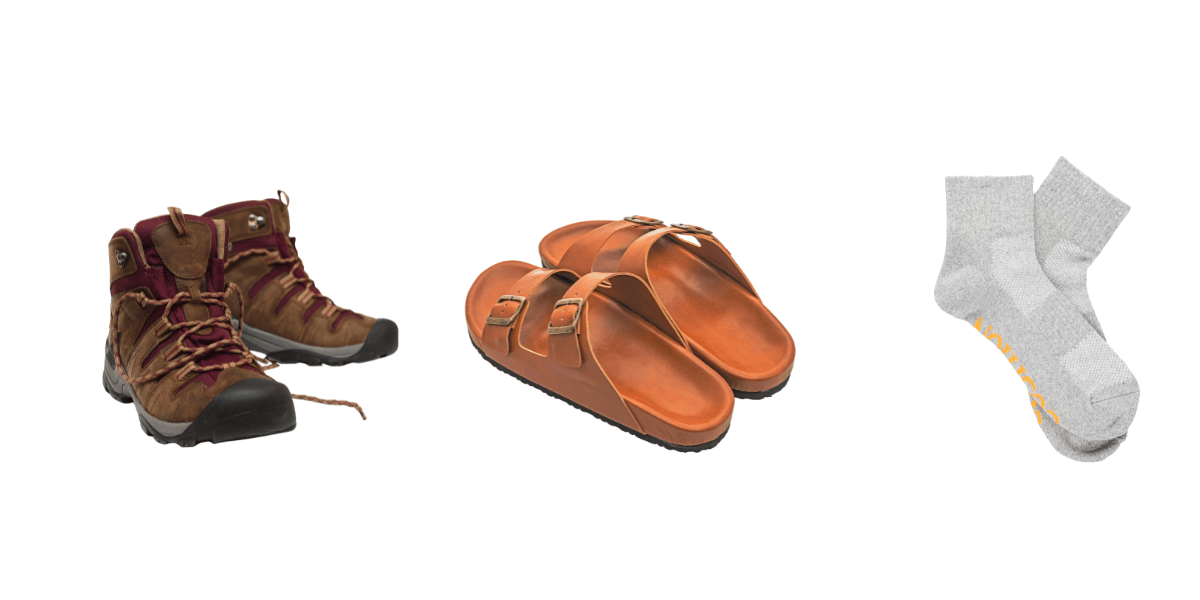
Based on personal experiences from my own Langtang Valley Trek, I can say with confidence that your footwear works as one of the greatest pieces of safety gear throughout your trek. Here is a list of footwear items that you will need for your trek starting from Syabrubesi all the way to Tserko Ri summit:
- Trekking Boots (1): Not just any hiking boots, but you will need a pair of waterproof trekking boots. As the terrains are steep and the descent can be even more challenging, if you are a beginner, get a pair of high-cut trekking boots for better ankle support.
Be it a mudslide or a snow-covered trail, a pair of trekking boots with grips that are not worn out can help you stay steady and move swiftly despite what the weather throws at you.
Make sure that your shoes are of the right fit. They should not be tight and should provide enough space for your toes in order to prevent rubbing against the shoes while ascending downhill.
- Sandals/Slippers (1): After a long day of walking around in your trekking boots, the last thing you will want to do is wear the same shoes while lounging in your hotel or visiting nearby attractions.
At the same time, you do not want to muddy the floors of the teahouses or shared dining spaces, and for this reason, trekkers are always advised to carry a pair of flat sandals or slippers.
- Socks (4/+ pairs): If you want to rotate your socks, carrying 3 pairs of trekking socks is a great idea. You can wear a dry pair while you clean and let the previous pair dry. Another pair is always kept for emergencies, in case you get the current pair wet in the rain or snow. But you won’t always have the time and energy to wash them, so carrying extra is always recommended!
Trekking socks are not like your everyday socks, they are mostly made of merino wool or other synthetic fibers. Furthermore, they feel thicker to the touch, as they are meant to provide extra cushioning to your feet.
The last pair can be a normal pair of socks to keep your feet warm while you sleep.
Your feet will take you to places that you never imagined would exist. So pamper them with the most comfortable pair of socks and trekking boots!
Must-Have Trekking Gears
Imagine having to rely on someone’s support for safety throughout the trek. That would be a hassle. This is why you need some trekking gears for this trek in order to have better support and increased self-reliance.
I personally applaud people who are used to trekking without any gears, because the rugged terrains demand support. But if you are not one of those people, then please refer to the trekking gears listed below because Langtang Valley Trek can humble anyone.
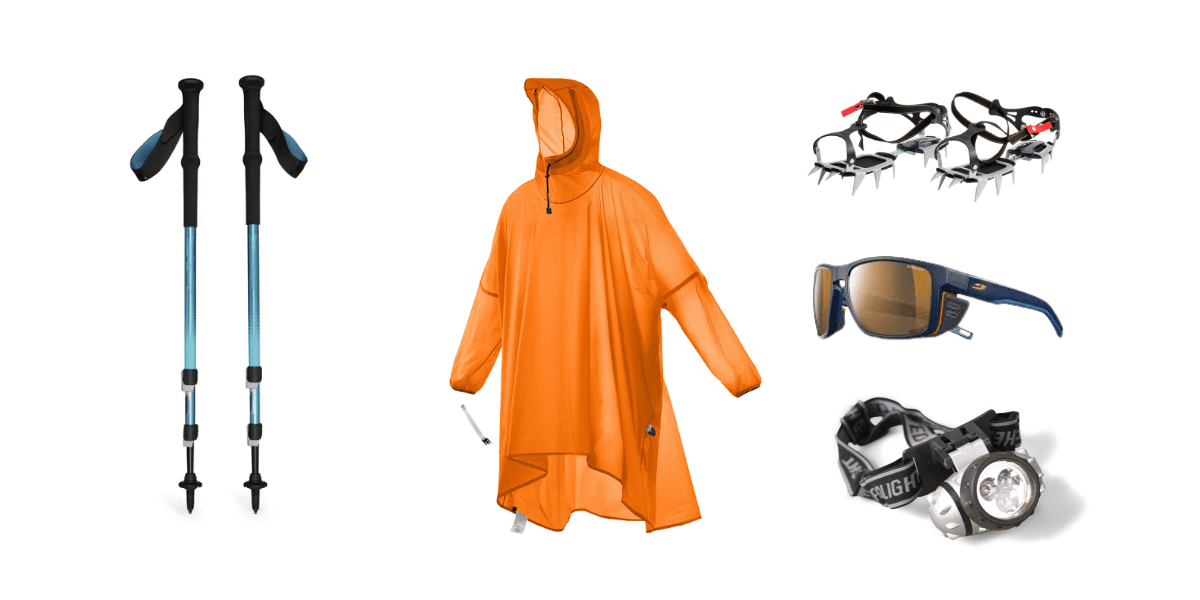
- Trekking Poles: Do not underestimate the trekking poles as these simple devices will protect your knees, whether you are climbing uphill or going downhill. By allowing you to use the sticks, you can apply more pressure on stress on your upper body and reduce the stress on your joints.
Your elbows should be at a 90 degree angle and your forearms should be flat to the ground. Furthermore, they can be really helpful in maintaining balance in the snow or slippery trails.
The Langtang Valley Trekking trail is decorated with nettle plants, and I myself had the misfortune of walking through it. So if you have a trekking pole with you, you can easily push such plants aside and carry on with your trek.
- Crampons: Think of crampons like accessories for your shoes. These traction devices can be worn by either stepping in on them or by strapping them under the outsoles of the boot where the grips are.
The spikes on the crampons do the main job, allowing you to walk on ice and snow. The spikes are known as points, and most of the crampons have about 10 to 12 points. Keep in mind that more points means better grip. Just make sure that the outsole of your trekking boots are stiff, and you’re good to go.
Note: Crampons are only required if you are doing your trek when there is snowfall or ice on the trail.
- Trekking Sunglasses: No, your normal shades won’t do if you are going on a trek, especially to a higher-altitude destination like Langtang Village. Because you are not just protecting your eyes from dust and debris near the mountains, but you are also going against snow blindness.
UVA and UVB rays are more extreme in high altitude regions, and for this reason, you must get polarized sunglasses. You can opt for Category 3 sunglasses as it protects your eyes from snow glares.
It is also known for giving 100% protection against UVA and UVB rays. They can be worn for medium to bright lighting and are perfect if you are planning to visit Kyanjin Ri and Tserko Ri.
- Headlamps/Torch: You cannot forget these! But if I had to choose between headlamp and torch, I would definitely go for headlamps because you will be using your hands to hold the trekking poles.
Apart from early morning treks in the lower-altitude regions, your headlamps and torches will come in handy if you plan on going for an early side trek to Kyanjin Ri and Tserko Ri.
Note: You can always check with the locals regarding the weather and check if you need more equipment. Some teahouses in Langtang also have spare gears which can be rented or borrowed.
Protecting Your Skin
Write this down: You cannot ignore your skin in the mountains. You might think that the mountains are free of pollution, but guess what, they are not free of UVA and UVB rays, extreme sunlight, and extremely cold winds.
Here are some skincare products that you can not miss out on during your Langtang Valley Trek:
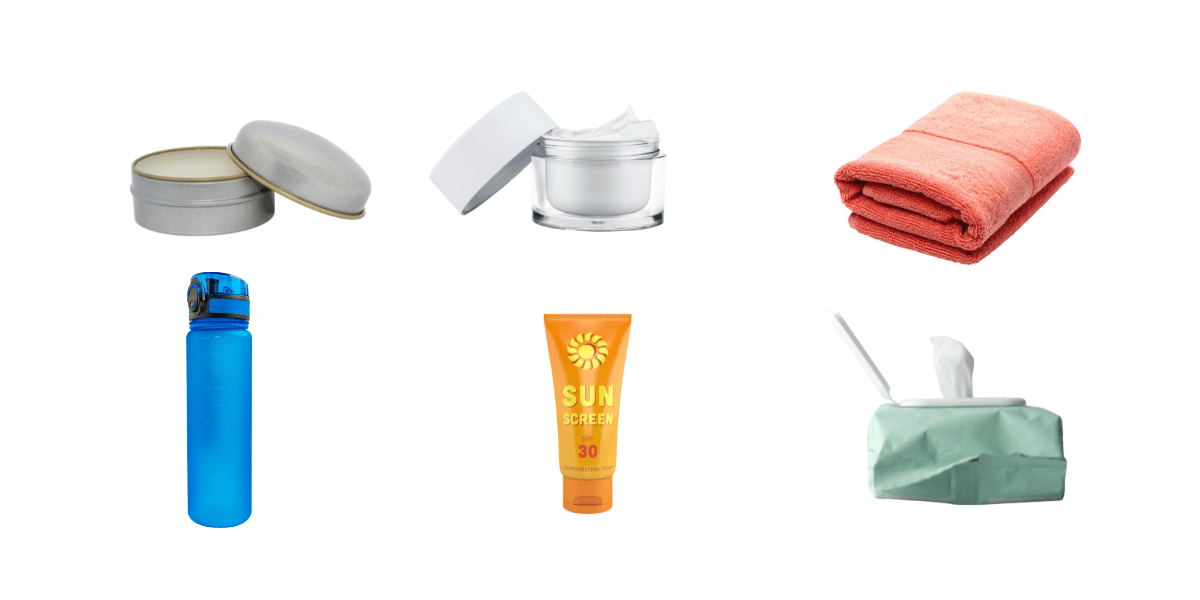
- Sunscreen: SPF 50+ or higher; that is the rule when it comes to choosing your sunscreen for the trek. Secondly, check if they are sweat-proof and water-resistant. And lastly, apply it every 2 hours.
Apply it on your face, and make sure to coat the layer properly on your nose, ears, and neck (it’s okay if your nose turns a shade darker, happens to the best of us). If you are not wearing gloves, apply it to your hands as well.
- Moisturizer: Although this has been mentioned after sunscreen, here’s a general skincare rule: always apply moisturizer before sunscreen. From strong winds to heavy rainfall, you will need a moisturizer that prepares your skin barrier for every possible weather condition.
If you want to save space, you can always look for a moisturizer that works as a sunscreen with SPF 50+. Just like your sunscreen, your moisturizer should be sweat and water resistant.
- Wet wipes: Wet wipes can be used for different purposes, and I consider it as a must-have. Water freezes in the morning, and if you cannot wash your face in the sink, you can always use the wet wipes.
Similarly, in places where bathrooms are cramped or hot water is unavailable, you can also use wet wipes to clean your body. Just make sure that they are alcohol-free and unscented.
- Lip balms with SPF: If you are protecting your entire face from the UVA and UVB rays, you might as well save your lips in the process. Adding lip balms with SPF to your backpack can protect your lips from drying up and keep them safe from sunrays.
- Towel: While carrying an actual bath towel is a hassle, carrying a face towel or a small sized quick-dry towel can be a great idea. These are light and occupy very little space in your bag.
Pack it on the top section of your bag so that it can be easily accessible after you wash your hands before your meals or after you wash your face on the trail to reapply your sunscreen.
- Water Bottle: Carrying a water bottle is not just for your skin, but it is also for your overall health. A 1L water bottle should be good enough for the trek because even if you run out of water, you can still refill your bottle at the teahouses along the way.
With these products, your skin will stay clean, safe and hydrated. And here’s another plus point: you will always be ready for a picture!
Note: Read our blog Best Time to Visit Langtang Valley to get a better understanding about the weather conditions so that you can decide better on what to pack and what not to.
Charging and Electronics
To keep your electronic devices working throughout the trek, you need to understand the charging facilities that you can expect during your Langtang Valley Trek. Since few places don’t have proper or stable electricity supply, here are the things that I suggest you know before the trek:
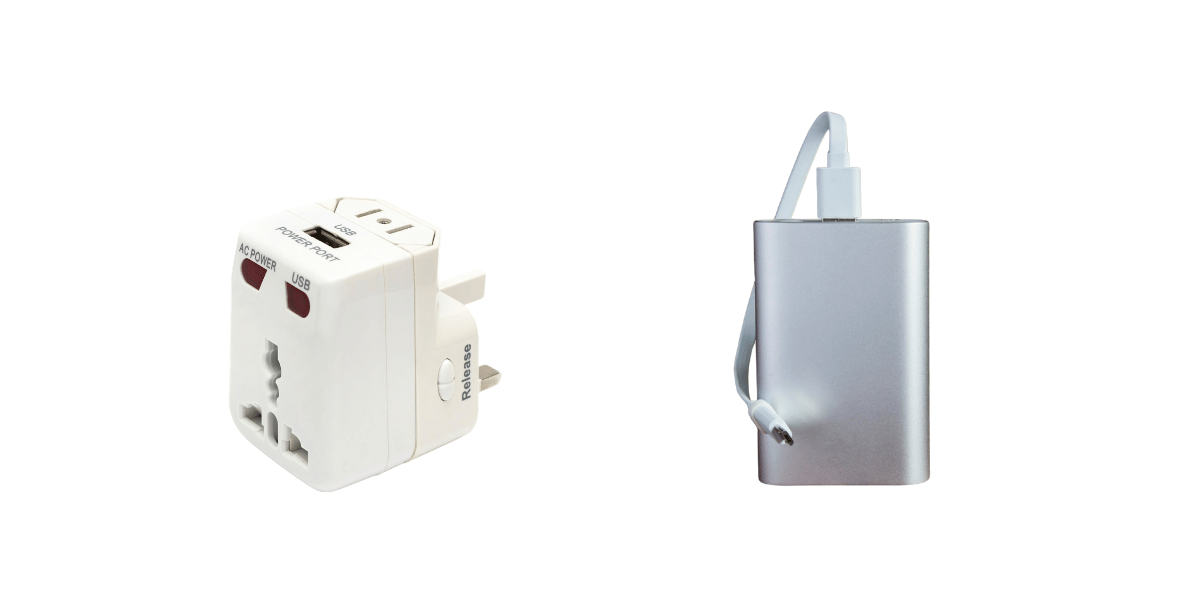
- Powerbank: Your powerbank is going to be a lifesaver once you cross Bamboo. Power supply and network connectivity are often determined by the weather in the mountainous regions of Nepal, and it’s always best to stay prepared.
Just make sure that your powerbank is lightweight and it’s even better if it is water resistant. Any powerbank between 10,000 mAh to 20,000 mAh should be fine for this trek.
But from my experience, once you get closer to the mountains, you won’t be using your phones as much because the views will keep you captivated!
- Universal Travel Adapter: The most common types of sockets that you will find in Nepal are Type C, Type D, and Type M, and those sockets are what you will come across during your trek.
The sockets handle up to 230V and 50Hz, please keep this in mind just to stay on the safer side and to prevent your devices from getting damaged.
I’m sure that you do not want to carry an entire extension cord throughout your trek. So this is where the universal travel adapter comes in to save the day. If the sockets of your teahouses are not compatible with your charger, a universal travel adapter can help.
- Just make sure that the adapter has built-in safety shutters, and please remember that they do not work as voltage converters.
Note: Batteries drain faster in the cold. So if you are carrying extra batteries, then wrap them inside your down jacket or sleeping bag if you are carrying one. You can carry your phone in your pocket, as your body heat can prevent the battery from draining.
Some places also allow you to charge your devices for an additional cost, so make sure to keep this in mind while you plan your budget.
Staying Warm
Before I continue on this, you need to understand that the items mentioned below are not optional add-ons. Read below to understand how each item can be useful in trekking.
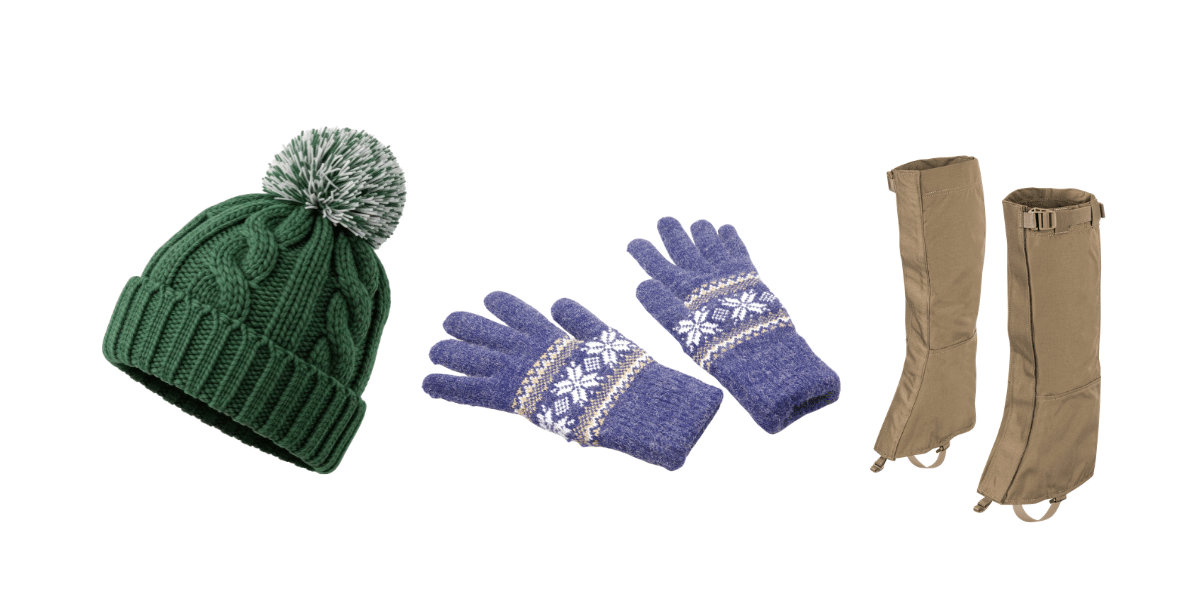
- Cap/Hat and Woolen Beanie: While caps and hats are not essentially used for staying warm, they are used to block sunlight from falling directly on the face, as well as for keeping you dry from light rains.
A woolen beanie on the other hand, is used to keep you warm in the mornings and evenings in Langtang Village and Kyanjin Gompa. While summiting Kyanjin Ri and Tserko Ri, you can carry it in your daypack in case it gets too cold as you hike higher.
- Gloves: Are you aware of the term “sausage fingers”? It’s when your fingers swell and turn blue in the cold, a common phenomena when you trek in the cold. This is why you need insulated gloves while trekking.
When choosing a pair of gloves for this trek, go for a quick-dry synthetic material. Although leather is known to be durable, if you get your leather gloves dry, they will get heavier. And lastly, make sure that they are the right fit and stretchable to hold your trekking poles.
- Gaiters: Gaiters are lifesavers. Be it a rugged terrain or trail covered in thick snow, your leg gaiters will prevent the dust, dirt, stones and snow from entering your shoes.
- For your Langtang Valley Trek, a knee-length pair of waterproof gaiters will be perfect as you cruise through the heat and the cold.
- If you want complete protection from the cold, you can also buy a neck gaiter separately.
- Balaclava: You will be met with wind, sun, and maybe snow during this trek, and having a balaclava is the best way to protect your face, nose, ears and neck. And if you feel hot, you can always roll it down and use it as a neck gaiter.
When it comes to material, merino wool wins again. If you don’t find a merino wool balaclava, then go for a synthetic fabric that is quick-dry, breathable, and odor resistant.
The last thing that you want in a high-altitude region is numbness from cold and hypothermia. So stay warm and make the best out of the trek!
First Aid Kit
For your Langtang Valley Trek, you will need a compact first aid kit. Don’t worry, you won’t need a lot of pharmaceutical products, as the trek is not too technical. I have provided a list below for you that you can refer to while packing your first aid kit.
- Bandaids: While we did not use any of the bandaids that we carried with us, bandaids are a must in your first aid kit. They will be very useful in case you slip or scratch yourself. Just make sure that your bandaids are water-resistant!
- Oral Rehydration Solution (ORS) or Electrolytes: Trekking means sweating and constant calorie burn, and ORS/Electrolytes is the most effective way to stay hydrated apart from drinking water. It can also be used if you have diarrhea or are showing symptoms of nausea.
- Acetazolamide/Diamox: Even if you have been to high-altitude treks before, make sure to carry acetazolamide with you. People often rush to catch up with their itineraries and that is not the most favorable choice of action while trekking.
If you are worried about altitude sickness, you can take this medication as a method of prevention. You must take the medication about 24 - 48 hours prior to your trek. However, please reach out to your doctor before consuming the medicine.
- Metrogyl: One thing about trekking in the Himalayas is that you do not have many options when it comes to food and eateries on the trails. This means when you are tired or hungry, you will be eating whatever is provided.
In case the food is unhygienic or does not settle well in your system, you might suffer from diarrhea or stomachaches. For this reason, always carry a file of metrogyl with you but consult with your doctor before consumption.
- Domperidone and Pantoprazole: Did you know that instead of buying domperidone and pantoprazole separately, you can now directly buy a combination?
You can either get the combination or get them separately. Carry them, as they are the most effective medication when it comes to treating gastrointestinal issues.
- Paracetamol or Ibuprofen: Trekking demands excessive physical movement, and at the end of the day it is possible that you might show symptoms of fever and weakness. This is nothing to worry about, as it is common in cold temperatures and high altitudes.
In such cases, make sure to carry paracetamol or ibuprofen, but do not consume more than the suggested dose.
- Blister Bandages: Blisters are quite common when it comes to trekking. As common as it may be, it is equally painful and can notably affect your pace. For this reason, always carry blister bandages in your first aid kit.
Note: Before you go on a trek, always consult with your physician and let them know about your travel plans. They are the only trustworthy people when it comes to taking advice on health and medications as they are qualified and aware of your medical history.
With this, we come to the end of the main section. I hope you are prepared for your trek. While tourists can trek independently, if you do not wish to go alone, you can always reach out to Altitude Himalaya!
Essential Paperworks: Permits and Documents

In order to enter the trails of Langtang Valley Trek, there are two permits that you must obtain:
- Langtang National Park Entry Permit: Since Langtang National Park is a protected area, it is mandatory for trekkers to apply for the entry permit. If you are trekking alone, you can obtain it at the army checkpoint of Dhunche before reaching Syabrubesi.
You will be asked to show your entry permit multiple times at different army checkpoints and other checkposts within the trail. For international visitors, the cost of the entry permit is NPR 3000, and for SAARC nationals, the cost is NPR 1500.
- Trekkers’ Information Management System (TIMS) Card: While many trekkers may say that the checking for TIMS Card is inconsistent and differ according to trails, trekkers, especially international visitors, are strongly advised to obtain it.
One can apply for it through the office of Nepal Tourism Board (NTB) or the Trekking Agencies’ Association of Nepal (TAAN) in Kathmandu. The TIMS Card is not only essential for your safety, but it is also required for the safety of your guide and porters in case of emergency.
And please keep in mind that you will need travel insurance in order to apply for your TIMS card. Make sure that your travel insurance is tailored for altitude regions and trekking.
Along with your permit and TIMS Card, always carry your passport, insurance document, and emergency contact details. You can carry them all in a waterproof ziploc and place them inside your fanny pack (if you are carrying one).
Note: If you are travelling through Altitude Himalaya, the guides assigned to you will get the entry permit for you and the TIMS Card will be obtained by the agency, avoiding the hassle for you.
Practical Packing Tips
Now that the packing list has been covered, let’s move on to the practical side, like packing effectively, carrying small snacks, saving battery, etc.
How to Pack Your Trekking Bag?
While most of the trekking bags provide back support, there’s an even bigger physics involved in the process of packing itself that is going to help you in unseen ways. To get a better understanding of what goes where, please look at the image below.
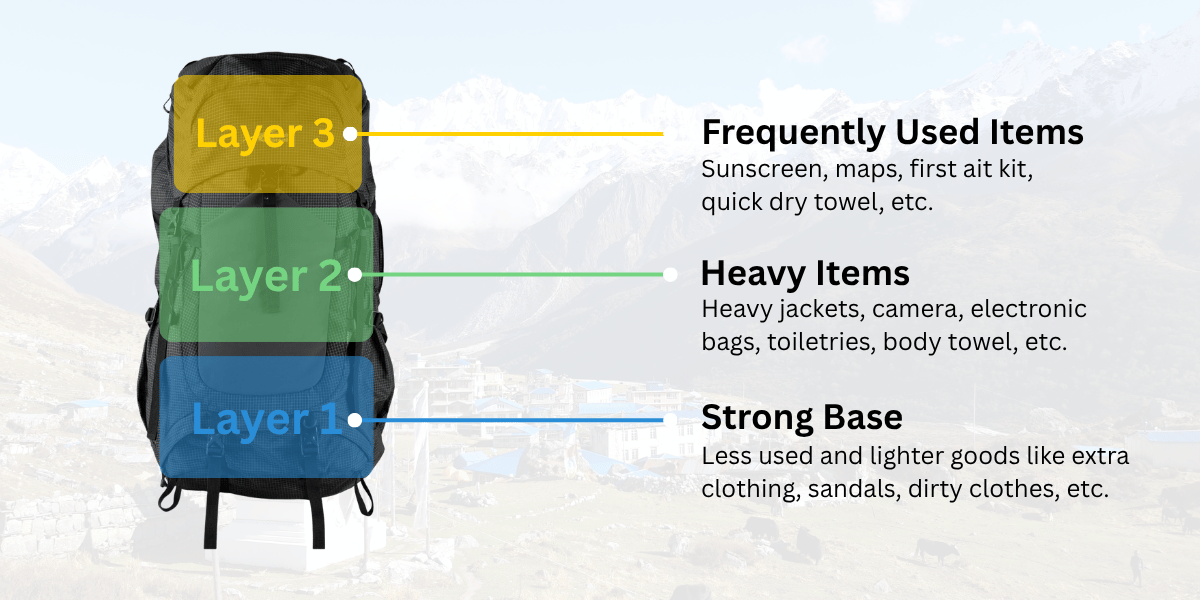
The image provided above gives you a general idea of how packing can distribute the weight effectively, ensuring that the weight is distributed throughout your back.
As you can see, your trekking bag should be divided into three parts:
- Bottom Layer: For the bottom layer, pack the lightest items that you have. This could be your sleeping bag, down jacket, and any clothing items that can be compressed. Doing so will also help keep your bag in place when you stop for rests at teahouses.
- Middle Layer: The heaviest items that you have will go in the back of the middle layer. This could be your trekking gear, clothes, and food.
Keep lighter items in the front of the middle layer. This means you can keep your snacks and lighter clothes (eg: thermal layers).
Place your water bottles in the side pockets of the bag so that you can get them with ease while trekking.
- Top Layer: This layer is for the things that you will need quick access to. If you have divided your snacks according to the days, you can place your snack of the day on the top layer along with the first-aid kit. These items can also be placed in the pockets of the top layer if you have them in your bag.
Other than that, you can also keep your fleece jacket and clothes to change into after you reach the place where you will be spending the night. Other items that you can carry on the top layer are your torch/headlamps, lighters, and permits.
By doing so, you can maintain balance and gravity while walking through the rough trails. This method also ensures that the weight falls on your hips instead of your shoulders.
Lastly, I would like to share a tip that my colleagues gave me throughout the trek: keep your powerbanks, phone, and batteries somewhere warm and dry. While your phone stays in your pockets and your body heat prevents the battery from draining, batteries and devices that run on batteries can be packed inside your down jacket and sleeping bag.
Carry Your Snacks
Trekking is an activity that is physically demanding, and having snacks in your bag is the best way to deal with fatigue and keep your energy levels high. Even if you want to save space and reduce the weight of your bag, try carrying at least one snack for a day.
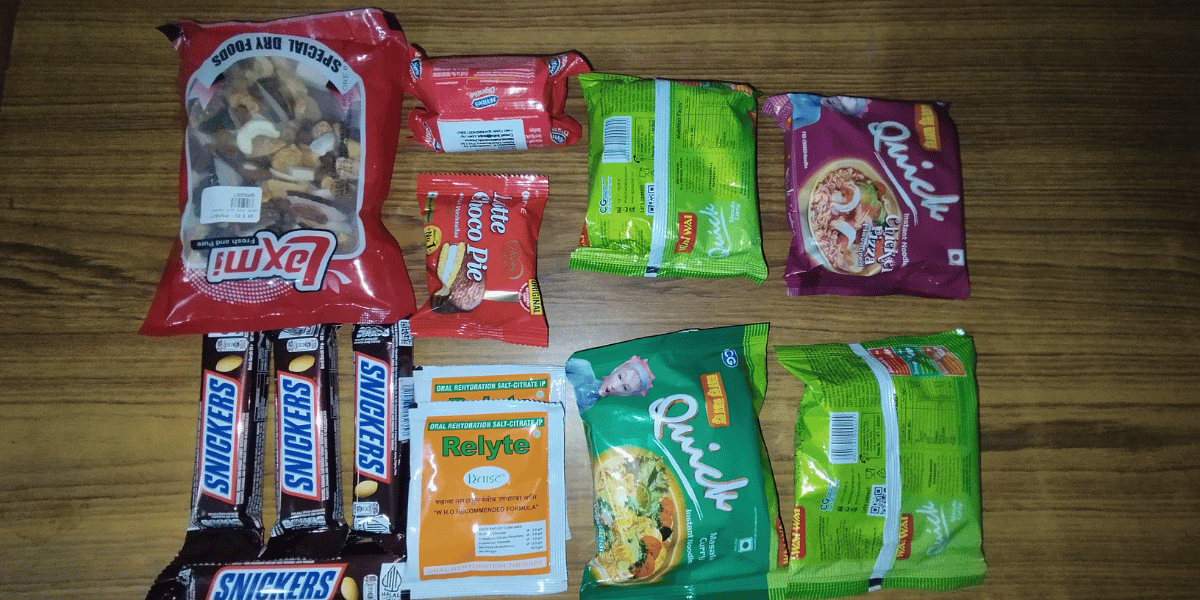
Here are some snacks that you can carry for your Langtang Valley Trek:
- Energy bars: No, chocolates won’t do when it comes to trekking, because the sugar rush is followed by a sugar crash. So make sure that your energy bars have balanced ingredients with enough fat, carbs, fiber, and protein.
You can munch on them when you start craving sweets mid-trek, a common reaction to glycogen depletion in your body after excessive physical movement.
- Dry fruits and nuts: Your dry fruits and nuts are best when they are a mix of almonds, walnuts, figs, raisins, and apricots. Rich in calories, this mix will fuel you up for your day.
- Trail mix: A trail mix is a mix of dry fruits, nuts, seeds, and sweet treats (dark chocolate is always the perfect choice). If you are preparing it by yourself at home, try this formula: 50% nuts, 20% dry fruits, 20% seeds, and 10% treats.
- Salty snacks: To balance the sweet, your body will eventually crave salty snacks. For such instances, you can carry salted peanuts and crackers.
While in Nepal, you can buy a couple of packets of ready-to-eat noodles which can be mixed with the spices provided in the packets. However, do not rely on them alone, as they have high levels of sodium.
As a beginner, I will stress the importance of snacks because there is nothing better than some treats to boost your motivation when you feel like giving up just before reaching the destination.
Conclusion
With everything covered, we have reached the end of this blog, and I hope that you have your packing list as well as your shopping list ready with you. This list has been created based on our first-hand experience of the Langtang Valley Trek in March, 2026.
The way you pack is an obvious factor that determines the way you feel on the trail. So plan smart and strategically. As implied above, layering is always better than carrying bulky clothes. And if you have hired a porter, make sure that your daypack has all the daytime essentials.
As a trekker, your journey begins when you actually start packing, so be mindful. Pack everything that you need, and don’t pack anything that you won’t need. Be aware of your body’s capacity and plan accordingly.
Langtang region is a beautiful place where the mountains, the people, and the culture meet to give you an unforgettable experience. The biggest souvenir that you will be taking back from this trek will be the memories and recollections of friendly conversations with strangers you meet on the way. Enjoy!


 Suraksha Subba